Go With A Pro Commercial Painting

How do you know if a paint job is good?

What’s the difference between a good paint job and a bad one?

As a professional painter in Virginia my job is to first estimate what a particular job might cost. Painting is a different ball game than most other home services.  Everyone thinks they can paint—just watch how fast the color goes up on those done-in-a-day home-makeover shows. Grab a brush, a roller, and a couple gallons of latex, and you’re all set.

The truth is, it is easy to paint poorly.  There’s no substitute for learning the proper steps, taking time to do the job right and improving your technique as you go.  Estimates will vary in ranges drastically.  Reasons will vary, typically the lower quotes come from painting contractors who are not licensed and insured, this is a huge detriment to the homeowners if they are not.  There are also people who do not know how to properly prepare and apply paint, understand sound business practices, nor do they participate in uniformly applying the industry standards to the work they perform.

As a consumer, it is sometimes hard to know if you have had a good paint job or a bad paint job and the unfortunate thing is that it could potentially take a year or longer to realize that you have had a bad paint job.

The first indication of a bad paint job will be the customer service the contractor provides from the time the initial call was made, to the estimate and the first few days on the job. If you are not feeling comfortable, you are probably right.

A good job starts with the initial call. How was your call handled, was there somebody there to receive your call? Was the person that provided the estimate professional? Did they provide all details of the job from the preparation methods, number of coats included, type of paint that will be used and any special requirements in writing? Did they address your concerns?


Things to Look for in a Quality House Paint Job

The definition of quality can be somewhat subjective. Yet, there are definite parameters that define whether you received a quality house paint job or not. You should be familiar with these seven things before you hire a painting contractor.

Paint Quality Tip #1 – Proper Protection from Paint

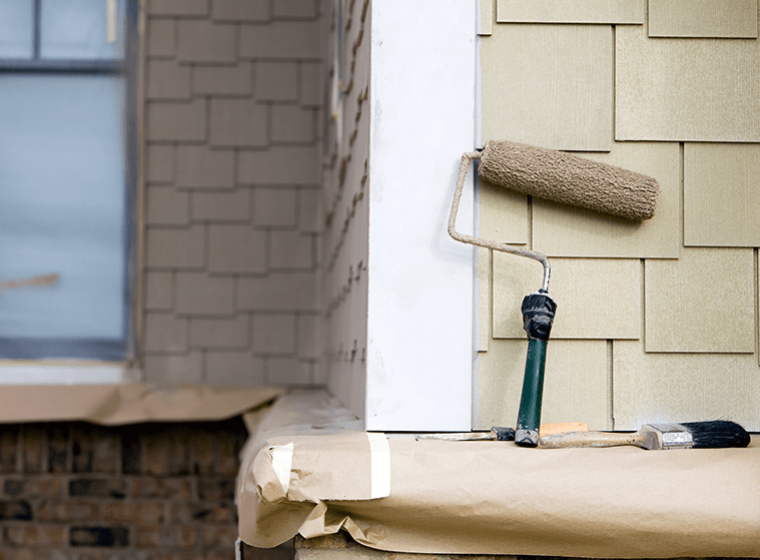
In most cases, a painting contractor isn’t working with an empty house. If you are painting the exterior of your house, protecting shrubbery and landscape plantings from paint is very important. Not only is paint ugly on your bushes, it can also harm the plants. Landscaping is an important aspect of curb appeal so you don’t want to have to reinvest in it after you’ve had your home painted. If the painting contractor is going to be working inside your home, you want to be assured that your furniture and floors don’t end up with paint all over them. You also don’t want paint on light fixtures and doorknobs. You want paint to be where it belongs and nowhere else.

Paint Quality Tip #2 – Proper Pre-Paint Preparation

A paint job will not last if proper pre-paint preparation techniques are not used. Things like silicone, wax, polish, grease and dirt will prevent the paint from adhering properly. Things might look okay for a short while, but when bad weather arrives, it becomes apparent that pre-paint preparation was sloppy.

Before new paint can be applied, it’s important that all dirt and grime, mold and mildew and chalking or peeling paint be removed. This is important whether the painting is in the interior of the home or on the exterior. Painting contractors may use water blasting as a pre-painting technique on exterior walls. Water blasting is a quick and easy way to clean off dirt and grime. It can remove mold and mildew. It can also remove paint that’s chalking or peeling. But it also has the potential for damaging exterior materials is too high pressure is used.

So how do you know you’re working with a professional? One sign is a professional will ask you to turn off the electricity to all the outlets and fixtures on the outside of the house. A professional will protect each outlet and fixture by wrapping it with plastic and securing the plastic carefully with tape. A professional contractor won’t expect to come back the next day and start painting if you have wood siding. The professional knows that it takes several days for the wood to dry out. In fact a professional will use a moisture meter to make sure that the reading is 15% or less before painting.

Paint Quality Tip #3 – Caulking

You have the right to expect a painting contractor to caulk holes, window frames and other trim areas that typically require caulking. One of the goals of painting your home is to protect it from the environment. Caulking prevents water from seeping in behind trim and causing extensive damage. On the inside of the home, caulking eliminates the home many bugs would like to make behind your trim work or cabinets. Caulking is all part of doing a quality job both inside and out.


Here are the few steps to check for a quality paint job:

  • First of all check the colour of your house paint. See that it is the same shade or tint you have chosen from the shade card (fan deck). See that the colour scheme has been strictly followed.
  • The paint on the walls should not drip. If signs of drips or dried drops re visible than inform the painter to sand it down and retouch it. If it dries then sagging defect may happen.
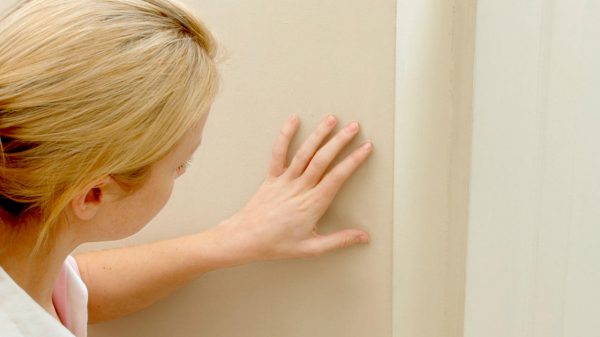
  • Check that all house paint is applied evenly and is free from runs and sags. See that the painted wall surface is smooth. Run your hand along the walls to check for imperfections.
  • Check if the original colours are covered properly with the new colour coat.
  • Check the edges of the walls and make sure these lines are straight and sharp. Uneven lines are signs of imperfections in workmanship of the painters.
  • Check whether caulking is done. Make sure that there is no leakage behind the trims because that may damage the wall surface.
  • The coverage of paint should be even, especially at the corners of windows and doors.
  • A good-quality paint job gives a clear-cut separation of colours. The lines between ceiling and trims, or the ceiling and walls should be clean, straight and sharp.
  • Check the paint at the corners of the doors, sidewall and also check the window corners.


Signs it’s time to repaint your house exterior

While there are general guidelines on how often to paint your home’s exterior, you may not know exactly when your home was last painted. In this case, you’ll need to watch out for a few things. When your home is giving you these signals, you’ll know it’s finally time to update your exterior paint job.

Telltale signs it’s time to repaint your house exterior

Damaged stucco and wood

While paint does help to keep these surfaces protected from the elements, no surface will last forever. You may see cracks in your stucco or signs of rotting in wood. At this point, you’ll need to assess the damage and repair the surface. Once this is done, it’s important to give the house a fresh coat of paint to ensure the surface is properly protected from the elements.

Bubbling, cracked, or peeling paint

If you spot paint that is peeling, cracked, or bubbling, it’s important to take action right away. Once paint peels away, it leaves parts of your home exposed to the elements. This could cause long-term damage. If the wood is exposed to rain or snow, it could lead to mold, mildew, and even rotting. If you notice any of these symptoms, it’s a sure sign that it’s time to give the whole exterior of the house a fresh paint job.

Cracked caulking

Caulking is usually around your doors and windows and is used to properly seal them. If you notice small cracks in these areas, they can sometimes be repaired by simply filling them in with fresh caulking. If left untreated, this can allow for moisture to seep in, which could cause lots of damage. If you notice larger cracks, you’ll definitely want to replace the caulking and add a fresh coat of paint to give it an added layer of protection.

Moisture stains and mold

Moisture stains and mold are sometimes just surface stains that can be wiped away or removed with pressure washing or a little elbow grease. However, sometimes these stains can be signs of deeper damage. If you can’t remove a stubborn stain, it’s a good idea to have a professional take a look at it. Many stains just need to be painted over, however, you might need to replace the material if there is more extensive damage.


Tips and Techniques for a Great Paint Job

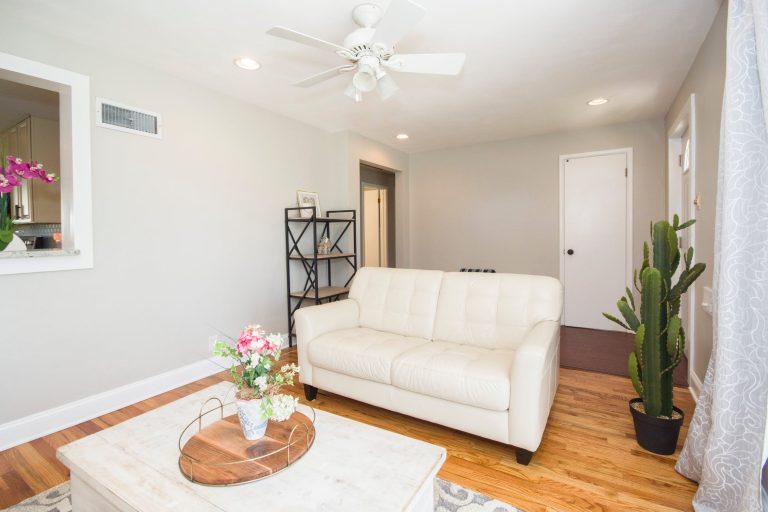
A room can be vastly improved with a fresh coat of paint. But if you have a love-hate relationship with painting, you’ll want to read our tips on how to paint efficiently and ensure a beautiful end result. You might even enjoy the project as much as the finished product!
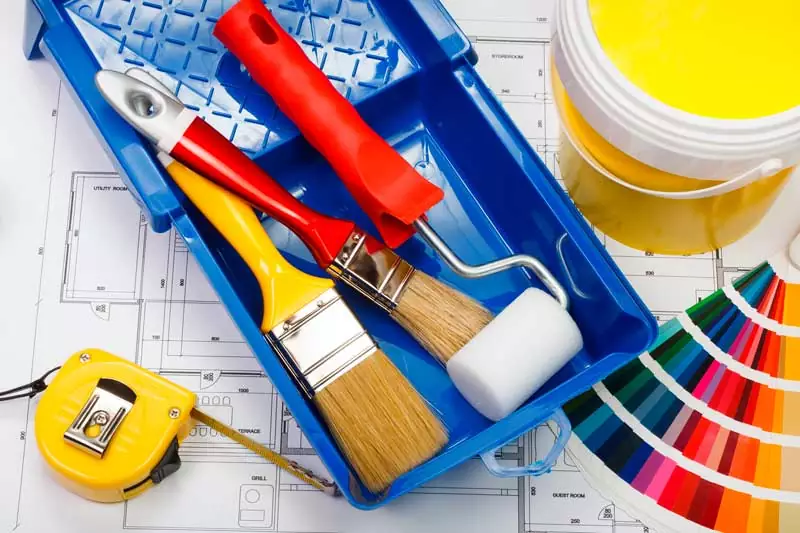
Start out Right

You’ll enjoy the job more if you get everything together at the start. Organize a tool station in the middle of the area you’ll be working in. Gather together your paint, brushes, rollers, hammers, screwdrivers, plastic bags, plastic wrap, rags, paint can opener, and drop cloths.

Plan a Day for Prep

Don’t try to get everything done in one day. Use the day before painting day to gather furniture in the center of the room, patch cracks and holes, put blue painter’s tape around doors and windows, and cover wall and ceiling light fixtures (light bulbs removed, of course!) with large plastic bags.

Clear the Decks

If you can, clear out all the furniture and accessories. Take everything off the walls. If you can’t move everything out, place the furniture and lamps in the middle of the room and cover them with a good drop cloth. Be sure that you tape the cloth around the furniture. Then put the second cover of plastic or old sheet over everything.

Remove All Hardware

It may seem easier to paint around doorknobs or cabinet hinges, but unless you’re a professional experienced painter, you’re bound to get drips around. So carry around some zip-top bags and remove all cabinet knobs and hinges, door knobs, light switch plates and outlet covers, and light fixtures. Place the pieces together in separate bags and clearly mark the contents and location (top left cabinet, bathroom door, etc) you took them from. This is a great time to clean the hardware! Put them back when you’re done painting.

Get Yourself Ready

No matter how hard you try, you’re bound to get drips (or more) of paint on whatever you’re wearing. So take off all jewelry. Reserve some old, but comfortable, clothes for your painting jobs. Slip-on shoes are easy to take off if you need to leave the room. You won’t have to worry about tracking drops of paint into other rooms. When you paint the ceiling, put a scarf, shower cap, or old baseball hat over your hair and some plastic over your eyeglasses.

What You Should Know About Installing Ceiling Fans

Ceiling Fan Blades Impact the Quality and Performance of a Fan

Ceiling Fan Blades

Blades may not be the first thing you think about when shopping for a new fan, but you may be surprised by how much blades affect both the aesthetics and performance of a ceiling fan. Whether you are looking for a new ceiling fan or want to replace an existing fan’s blades, there are several factors to consider. Some blades are created to withstand outdoor environments, while others are meant to lower energy costs inside your home. By understanding the importance of ceiling fan blades, their types, and in which rooms they are suitable, you can make your home’s ceiling fan work for you—and even reduce your cooling costs in the process.

How Many Blades?

There is a common misconception that five ceiling fan blades work better than four or even three blades. Homeowners assume that five blades means better air movement, circulation, and less cooling costs, but in reality, all five blades do is add aesthetic appeal. According to Energy Star more blades do not move more air1 – even one, two, or three bladed fans can be extremely efficient — what matters is the strength of the motor powering the fan.

Blade Span

Blade span refers to the width of a fan, from blade tip to blade tip. The most common ceiling fan blade spans are 52 and 42 inches. Longer blades work best for larger rooms and create softer, more comfortable airflow. Shorter blades offer more direct airflow and are ideal for smaller rooms. The volume of air is not determined by blade span, but by the motor. A motor with smaller blades will move a greater quantity of air than the same motor with larger blades.

Blade Types

For general, in-home use, many ceiling fan blades are made from particleboard or medium-density fiberboard (MDF). High-quality ceiling fan blades, on the other hand, are made from furniture-grade, real hardwood, many with hand-carved intricate designs. Regardless of the material from which they are made, blades come in a wide variety of colors, patterns, and styles to match any room’s décor. If you are shopping for a fan that will be used outdoors, you will want to look for fans with damp or wet-rated ceiling fan blades.

What are the signs of a fan needing replacement?

As I’ve mentioned, there’s no definite things to tell you that you have to replace it. But initial signs of the following deserve to be looked into:

  • Annoying buzzes that develop after a few years.  This is due to either sub-standard capacitors or poor quality motor windings and laminates.
  • Wobbling – a properly installed fan should never wobble.  This is a sign of an inferior hanging device or unbalanced blades.
  • Squeaky sound of the fan even after oiling.
  • Diminishing speed.
  • Recurring technical issues even after a professional fix.

How to choose a ceiling fan size

Fan diameter for room size

The amount of air circulated by a ceiling fan is determined by its diameter. Larger rooms require fans with larger diameters, while smaller spaces require fans with smaller diameters:

Small rooms

100 square feet or less work best with a small ceiling fans that range from 30 inches to 48 inches. Small diameter fan sizes are ideal for home offices and laundry rooms.

Large rooms

400 square feet or less work best with medium ceiling fans that range from 48 inches to 54 inches. Medium diameter fan sizes are ideal of living rooms, bedrooms, and kitchens.

Great rooms

Over 400 square feet work well with large ceiling fans 56 inches or larger. Large diameter ceiling fans are ideal for open-concept living areas or lofts with ample space.

What is the difference between 4-blade and 5-blade ceiling fans?

The main difference between a 4- and 5-blade ceiling fan is one of aesthetics and personal taste. However, the laws of physics do dictate a slight difference in performance between ceiling fans with different numbers of blades.

As a rule, as the number of blades goes up, the fan tends to be quieter and circulates less air. Additional blades increase the drag on a ceiling fan’s motor and slow it down. This is one of the reasons why industrial fans (like wind turbines) usually have only two or three blades. They can go faster and move more air, and noise isn’t so much of a concern.

Many ceiling fans designed for the home come standard with four or five blades. Beyond having a pleasing symmetrical aspect, it’s at the 4-blade and 5-blade level that the ideal balance is achieved between the amount of air circulated and amount of tolerable ambient noise.

These days, you are unlikely to notice any major difference in job performance between fans with fewer or more blades. Advancements in overall residential ceiling fan design, balance, and low-drag blade shapes and pitch ensure that ceiling fans with a non-standard number of blades are able to do their job well. Even if you opt for a ceiling fan with an expansive seven blades, you can rest assured it will still perform well.

WHAT IS BLADE PITCH?

Blade pitch is the angle of the blade from the motor. The higher the pitch the greater the movement of air. Are some fans more powerful and quieter? Another key feature to look at when purchasing a fan is motor power. Motors are measured in watts and poles, often indicating how powerful the motor is. The speed of the motor, along with the rest of the design, can have an impact on how the fan operates and the noise it emits. Quieter fans are generally more desirable, however, quiet fans do tend to cost a little more. Direct Current ceiling fans (DC ceiling fans) deliver the ultimate in power and performance. Consuming 75% less electricity than standard ceiling fans, and costing only about 1 cent per hour to run*, while producing better airflow.

*The calculation of costs and savings are approximates only and may vary according to use and size of the fan

Preparing For A Visit From Commercial Painting Contractors

Commercial Painting: The Advantages of Hiring a Commercial Painting Contractor

When it comes to having a fresh and beautiful looking office or any other commercial building. You will want an inexpensive and effective option for its time to time maintenance. Getting its interior and exterior painted is probably the best option that you can choose in contrast to other refurbishment options. By simply adding fresh coats of paint to your office, warehouse or other building you can significantly improve its visual appeal. This will also help you to maintain a better position in your business market. A beautifully painted commercial area infuses a good vibe among your staff and potential customers.

Sound Knowledge

One of the biggest reasons to make sure that you hire a professional for your commercial painting project is because of the amount of knowledge they can bring to your project. Commercial painting pros have extensive experience with various types and colors of paints used in this line of work, and will be able to tell you which brands and manufacturers are going to work best for your needs. In addition, most professionals can provide you with a complete color consultation to ensure that you know before any paint goes up on your walls, exactly what you are going to be looking at. Finally, because the pros know the right way to put your new coat on, you can rest assured that the results of your paint job are something that you can enjoy for a long time to come, and don’t have to worry about prematurely deteriorating.

Importance of Interior Design Colours

When you choose to repaint your commercial space make sure to use the right combinations of colours. As it also helps to uplift the employees mood and productivity at work. The way you design your office interiors will tell volumes about your attitude for your business. This can positively influence your potential customers and turn them into regular clients.

However, painting large-scale and commercial properties is not a simple activity. It is best handled by a professional team of commercial painting contractors. This will affect both your customers and employees in your favour. They have the required experience and resources to effectively finish a large scale painting work. Plus they will do it in the most cost effective way and on the right time. By using their professional painting services you can also get a beautiful exterior and interior of your residential area.

These people are very well versed in their job and do it without any flaws. You must know about the best perks of hiring commercial painting contractors. When you decide your next painting project here are some top advantages of choosing commercial painters. 

Methodical approach

Exterior commercial painters follow standard operating procedures, from painting preparation to clean-up and disposal, to produce high quality results for their clients. For national or multi-site painting projects, they understand the necessity of providing a consistent level of service, quality, project management and pricing.

Modern equipment and tools

The painting industry has seen a number of technological advancements in the past decade, with new tools being introduced. Painting contractors have access to this new equipment, such as specialist Elevated Work Platforms and scaffolding, due to their existing relationships with painting suppliers and manufacturing companies, which ensures that your building is receiving the best possible treatment.

Commercial Painting Contractors Tackle the Project Correctly

We touched on this a bit in our introduction, but it is worth repeating: The process of applying color tint is complicated, and a painter of a non-professional stature will not know how to properly handle it. If coats are not applied evenly, the resulting aesthetic will feature mismatched spots and discoloration, so this is why the services of a professional commercial painting contractor are very important. A commercial painting contractor possesses the appropriate tools to ensure that the job is done correctly.

Commercial Painting Contractors Save Time

Commercial painters know they are at your site to get a job done – period. They keep to a set timeline and strive to get the project completed within that established period as a sign of efficiency, at the very least. A seasoned commercial painter will ensure that his team does not compromise on quality even when coming up against a short deadline/timetable.

The Experience Is the Guide of Pros!

One of the best benefits of hiring a commercial painting contractor is their experience.

Professional painters know perfectly how to do a big project like painting more than one-story buildings or the equivalent of thousand square feet. The best teacher is practice. With that being written, we can say that some commercial painters have crafted their skills over more than a decade.

So, good painting contractors have experience and high-quality work backing them up. Thanks to their experience, you can rest assured that your painting projects will be completed correctly. In other words, you can have peace of mind that your final coats of paint will have an even finish. Not surprisingly, it’s reasonable that you expect high-quality results from a company that is a “certified painting contractor.” Not even the most adept do-it-yourselfers can match the beauty and lasting protection that a painting contractor provides to your walls with every brush stroke.

The Beauty Of A Black Ceiling

How to choose the best ceiling fan

Ceiling fans are a great way to stay comfortable when the temperature rises. They can work in tandem with your air conditioning to circulate cool air, or as a cost-effective alternative. When choosing the best ceiling fan for your space, there are a few things you might want to consider.

What size ceiling fan

It might sound obvious but the basic rule is the larger the room, the bigger the fan required. For a small room (up to 20 square metres) fans with blades up to 122cm are ideal. For a bigger room, you’ll probably want to look for a fan with blades that are 130cm or more

Take control

Generally, there are two options when it comes to controlling your fan. Either a wall switch with a dial to vary the speed, or a remote control if access to the roof and wiring is an issue.

Three or four blade ceiling fans

Most fans have either three or four blades and are made of either plywood, metal or plastic. The number of blades has no effect on their ability to cool a room but timber and plastic blades do tend to be a little quieter than metal.

Finish and colour

Another factor worth considering is how your fan is going to look within a room, as they can become a dominant feature. This is not too much of an issue if it’s going to be installed in an outdoor area, but for indoor fans it’s worth thinking about how it will complement your colour scheme and décor

How to Choose the Right Size Ceiling Fan for Your Room

There’s more to choosing a ceiling fan than grabbing one you like off the shelf. It first begins with understanding the height, size and type. Follow the steps to properly measure to get the right fit.

Did you know that a ceiling fan can make a room 8 degrees cooler and help save you on energy bills? Your ceiling fan is there so you can kick back and chill out. But there’s more to choosing a ceiling fan than grabbing one you like off the shelf. Of course there are many styles and you want it to look great, but it also has to be the correct size and type. For maximum performance and comfort, you have to consider the distance from the ceiling to the floor as well as the dimensions of the blades

Determine the correct blade span for the room

It seems obvious that you want a smaller ceiling fan for a smaller room and a larger ceiling fan for a larger room. But for best performance, you need a ceiling fan with the correct blade span for the room. If the fan has an odd number of blades, measure from the center of the fan to the end of one of the blades and multiply the number by two. If the fan has an even number of blades, measure from one end of a blade to the end of the blade on the opposite side.

Determine how high to hang your fan

How high you hang your ceiling fan and the type of mount you need depends on the height of your room and whether or not the ceiling is sloped. Hanging your ceiling fan at the right height will give you the best airflow.

Determine the right downrod

Choosing the right downrod is important so that you can mount your ceiling fan at a safe distance from your head

HOW TO CHOOSE CEILING FAN SIZE – DOWNROD LENGTH AND VAULTED CEILINGS

HOW TO CHOOSE THE RIGHT SIZE CEILING FAN

If you are having a hard time deciding what size ceiling fan you need, you are not alone. There is a lot of conflicting information about this all over the Internet and the so called rules have changed dramatically over the last few years with the insurgence of a wider selection of ceiling fan sizes for use in residential applications. In the past, there were pretty much just 3 sizes: 42″, 48″ and 52″ the most popular of which was the 52″ fan. Now, manufacturers are making residential ceiling fans that are 60″, 72″, 84″ and even 99″ and the most popular size is now 60″. The trend is toward using larger fans in smaller spaces. So in our opinion, most of the ceiling fan size charts you find online are very much outdated, including the chart published by the EPA on the EnergyStar.gov Website. Below is our very own ceiling fan size recommendation chart that comes from our over 30 years of experience selling and installing ceiling fans.

What Size Fan Do I Need? BIGGER IS BETTER: The main cooling effect is felt from directly beneath a ceiling fan and drops off dramatically within about 2 feet from the blades. If the fan is in the middle of the room with seating off to the side, use as large a fan as you can handle. If the seating is directly beneath the fan, use a fan large enough to cover the seating area

WHY IS BIGGER BETTER?

From a performance standpoint, the majority of the breeze you are going to feel from a ceiling fan is directly beneath and within the space about 2 feet past the blades. The direct airflow and wind-chill cooling effect diminishes greatly right outside that area. For this reason, the size of the fan you choose is very important in order to actually feel the breeze where you need it. If the fan is going to be positioned directly over the area that needs to be cooled, a smaller size fan that is proportional to the room is quite appropriate. If the fan is not directly over the area where you will be spending time in the room, use a larger size fan that gets the blade tips as close as possible to that area. Whether or not a fan “looks” too large is a matter of personal preference. Technically, as long as the blades are at least 30″ from the nearest wall, there is no reason you cannot install a fan that is quite large in the space. The trend from ceiling fan manufacturers today is BIG and there are a lot of fans now that are over 60″ because fans simply cover more space when they are larger.

IS HIGHER CFM BETTER?

Although higher CFM (cubic feet per minute of airflow) is normally a good thing to consider, you must also make sure you consider how it correlates to blade span. Many people assume that a very large fan, say 72″ to 96″ that produces 10,000 CFM is going to cool them off better than a smaller fan, which is not likely the case. CFM is only the amount of air that is displaced, it is not a measure of how fast the air is moving, which is called wind speed. Wind speed is what actually creates the breeze or wind-chill effect that makes you feel cooler. Just because larger fans spread a larger amount of air over a larger area does not mean the move the air faster, it only means the move more air and the actual wind speed may be lower than you think. For example, you will feel a much stronger breeze from a 52″ fan that produces 7,000 CFM than you will from a 96″ fan that has the same CFM. that’s because the smaller fan is moving the same amount of air in a more concentrated area at a much higher speed. The larger fan is moving that air over a larger area at a slower overall speed. To to make sure you are not disappointed, we are the only be sure to compare our “Wind Speed Factor” between larger and smaller fans so you have a better idea how much breeze you will actually feel. Wind speed factor is our own exclusive calculation that is a relation between CFM and blade span. In most cases, two smaller fans with a higher “Wind Speed Factor” will outperform one very large fan. If you cannot install two fans, choose the largest fan you can tolerate visually with the highest “Wind Speed Factor”. A good amount of wind speed would be 3.5 to 4 MPH or more.

How to choose the right ceiling fan

Ceiling fans are a great way to cool your room without running up an astronomical electrical bill. A ceiling fan consumes about 50 to 60 watts while an air-conditioner sucks up 500 to 1000 watts – you can imagine the difference it makes to your electricity bill! Follow our tips before you head to the shops.

Determine the right size of the ceiling fan

Firstly, measure the longest wall in the room

Position your ceiling fan properly

This should ideally be the centre of your room so as to circulate air evenly. If the room is huge, you should have two ceiling fans.

Consider the ceiling height

The higher the ceiling, the more powerful the fan you need.

Decide on the number of blades you want

The more blades the better? Not always.

How to choose a ceiling fan

In addition to cooling your space, a Hunter ceiling fan adds that decorative touch that ties the room together. Hunter designs a variety of ceiling fan styles with whisper-quiet motors and high-performance features to ensure maximum airflow. With so many ceiling fan sizes and styles to choose from, you may be wondering how to choose a ceiling fan for your space.

Residential Ceiling Fans

Hunter creates residential ceiling fan styles to go with every lifestyle. Innovative features and a variety of styles ranging from traditional to modern are ready to instantly upgrade the look of your home.

Industrial Ceiling Fans

Our industrial ceiling fans are designed to increase airflow while reducing energy consumption. These high-volume, low-speed (HVLS) fans are incredibly lightweight and circulate air more than any other type of traditional ceiling fan on the market. Hunter industrial fans provide super-quiet performance and our impressive fan warranties are among the best in the industry.

Indoors

When temperatures rise in the summer, a ceiling fan can keep your home feeling cool. During chilly weather, a ceiling fan can distribute heat throughout your home, too. While some outdoor fans can be used indoors, indoor fans cannot be used outdoors.

Outdoors

When choosing a ceiling fan for an outdoor space, pick a model with the appropriate Underwriters Laboratories (UL) and Electrical Testing Laboratories (ETL) rating. Otherwise, technical difficulties with the fan can arise. For example, if the fan isn’t rated for the proper type of outdoor use and it’s exposed to humidity or rain, pieces of the fan could rust and impact operation.