Cost Effective Laminate Flooring For Your Home

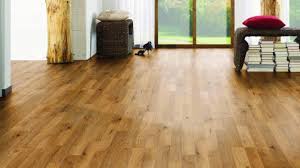
How to Polish Laminate Floors

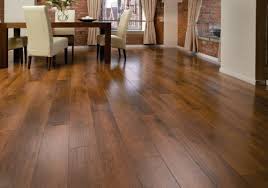
Laminate flooring, loved for its durability, price, and range of color choices, is relatively low maintenance when compared to other types of flooring. Despite this, the laminate can lose its shine over time, typically due to a buildup of dirt and grime. Unlike wood floors, you cannot wax it, and using any type of soap-based product will actually make the floors duller. A good cleaning and a product specifically meant for laminate floors will make the laminate look like new.

Thoroughly sweep the floor, removing any crumbs, dust, pet hair, or other dirt. Clean along the walls and underneath furniture, as dirt and hair tend to slide across laminate flooring; if you just get the visible areas, any slight change in the air can push dirt out from its hiding place and onto the floor, causing you to have to sweep all over again. A dusting mop or broom and dustpan are typically best for this; however, a vacuum with a hard floor setting can also do a thorough job.

Add one cup of distilled white vinegar to a gallon of warm water. Clean the floor with this mixture using a soft mop. Although there are laminate flooring cleaners on the market that are not soap based, good old-fashioned vinegar tends to produce the best results.


What is the difference between a real wood floor and a laminate floor?

The main difference is that laminate flooring is not made of wood it is a photograph of an particular wood species or stone pattern that is adhered to a dense particle board or high density fiberboard center core. The top layer is protected with layers of a protective finish.  “Quality” laminate floors are not easily scratched or dented and they are easily installed — usually in a glue less click-together floating method. These durable floors are more resistant to stains than real wood and will not expand or contract as much with seasonal changes in humidity and temperature. Laminate flooring cannot be sanded and refinished like real wood flooring and would have to be replaced when worn out or scratched. Laminate floors are very popular in high trafficked areas like Kitchens.

Wood Flooring is real wood, durable but not quite as durable as a Quality Laminate floor. The advantage of real wood is that most can be sanded and refinished new again lasting many years. Hardwood Flooring is the only floor covering that will also increase the value of your home.

Where Can I Install A Laminate Floor In My Home?

Laminate flooring can generally be installed on, above, or below grade in the home. Many manufacturers warrant their laminate floors against moisture — so they’re good for use in kitchens and half-baths. We don’t recommend laminate floors in full baths where excessive water will be spilled on them. The best floor option for a full bath would be ceramic tile or vinyl flooring.

Can Laminate Flooring Be Installed Over Radiant Heat?

Laminate floors can be installed over radiant heating systems without a problem. The manufacturer will note in their installation instructions if there are any special procedures required. Since laminate flooring isn’t a wood product, most of them have superior heat resistance attributes.

How Is A Laminate Floor Installed?

Most laminate floors manufactured today are installed using a type of Click Lock floating method over a foam pad. There’s no adhesive, nails or staples necessary. You can also use your new laminate floor right away, there’s no waiting for anything to dry or set.


How to fix scratches

So what do you if you move a piece of furniture and it scratches your floor? You can fix scratches on laminate, but it depends on the colour and depth of the damage. Small tubes of floor colour fillers are available online, but be careful to buy a shade that matches your flooring. This solution usually works if it’s a minor scratch.

It’s a really good idea to purchase a few extra floorboards when you initially install it. These can be used to replace boards that are severely damaged over time. The products on sale change all the time, and the one you used may not be available down the line, so it’s a good idea to have a few spares packed away for a rainy day.

Some customers come to us to choose flooring for a particular room, with plans to laminate other places in the home at a later stage. Although it’s a more significant upfront investment, we recommend that they buy all the flooring they need for the future and store it until they’re ready. Trends, finishes and product lines change. You want the floors in your home to look consistent, and we can’t guarantee the same product will still be available when you return to complete the flooring in your home.


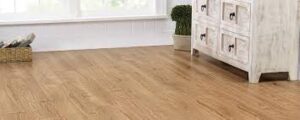
Things to Know Before Choosing Laminate Flooring

First introduced in the 1970s, laminate flooring is comprised of layers of synthetic material engineered to look like wood or stone. It quickly became a popular choice due to its durability and low price, garnering a reputation as an affordable alternative to the real thing. Today’s laminate has come a long way since it first hit the market, and its quality and appearance continues to improve, with more options than ever available now. To find out if this material is right for your budget, lifestyle, and aesthetic preferences, first consider these pros and cons of laminate flooring.

There’s an option for virtually every style.

All laminate flooring has a core layer topped by an image layer, into which a digitally enhanced photo of a natural material is embedded to mimic everything from exotic hardwoods to concrete to natural stone—a major pro. It comes in a variety of colors, lengths, and widths and, these days, texture can even be embossed to give the flooring a more realistic feel. Still, some critics insist that no matter how high-end the product, laminate simply can’t compare with the natural beauty of real wood or stone.

Laminate flooring is cheaper than wood…

Laminate flooring can run about half the price of wood flooring but, as with wood, you’ll find a range of varying quality. Some look more realistic than others, and some are less substantial in the thickness of the different layers, making them more likely to wear out sooner than a higher-quality product. You’ll typically find laminate options starting at less than $1 per square foot and topping out around $5 per square foot.

but you can’t refinish it.

Despite technological advancements in laminate flooring, it still gets its look solely from the image layer, which can’t be sanded and refinished when it starts getting worn. Wood, of course, can be revived multiple times over its lifetime, with the potential to last decades. So while the upfront price might be right for laminate, know that in the long run, wood might be a better buy. In addition, wood offers a higher return on investment in terms of your home’s resale value.

Laminate has varying degrees of durability and resilience.

Knowing that laminate can’t be refinished naturally makes you wonder how long it lasts. Fortunately, there’s a highly durable wear layer above the image layer designed to withstand foot traffic, sun fading, scratches, dents, and stains. And if a piece does get damaged, you can often replace the individual plank. But in case you can’t pull up the unsightly plank, repairing a scratch or dent in laminate flooring can be tricky at best and impossible at worst.

Most manufacturers have an AC (abrasion criteria) rating assigned to each product, which details the specific usages they’ll hold up best under. The higher the AC rating, the more durable the product will be. Keep these numbers in mind when shopping to choose a product that can tolerate the demands of your household and get the longest life possible:

  • AC1—moderate residential use (like bedrooms and closets)
  • AC2—general residential use (like living rooms and kitchens)
  • AC3—heavy residential use or moderate commercial traffic
  • AC4—general commercial traffic
  • AC5—heavy commercial applications

Laminate is easy-care—with some caveats.

Excess water can cause laminate flooring to warp or stain, so aside from sweeping and vacuuming as needed, it should be cleaned carefully, generally with plain water. Use a flat mop and wring out the water before each pass. For tougher cleaning jobs, use a commercial laminate cleaner. An acetone-based solution (like nail polish remover) can help tackle tough stains.


Tips to Prevent Laminate Damage

  • Never allow standing water on your laminate floor for a long time.
  • Always mop up the spills as they happen.
  • Avoid wet mopping laminate floor, instead, you can dry mop it for longevity.
  • Always use recommended cleaning products to avoid leaving behind a sticky floor after mopping or even cause other floor damages.
  • Maintain a 35-65 percent relative humidity level always. You can use dehumidifiers to maintain this relative humidity.
  • It is always wise to consult wood floor professional about your laminate flooring repairs and problems

Secrets For Looking Beautiful And Elegant For Your Wedding Videographer

Common Mistakes People Make When Hiring A Wedding Videographer

A wedding is one of the most important milestones in our lives and reliving those cherished moments brings us immense joy and happiness. A wedding videographer uses creativity and skills to aesthetically capture the emotions and interactions of the participants at the wedding.

There are a large number of wedding videographers offering services but knowing what to look for when you hire them is a tricky affair. Not being cautious of certain aspects when you hire a wedding videographer can leave you with a sub-standard wedding video.

We Will Share With You Common Mistakes People Make When Hiring A Wedding Videographer

Not Meeting With The Videographer And Watching Samples Of Their Work.

Engaged couples often make the common mistake of not familiarizing themselves with the videographer and their work. This often leads to mishaps on the day of the wedding and unexpected surprises when finally previewing the wedding video.

Some video production companies often have sales teams that will meet with couples and close the deal. While it’s good to meet the sales team, it would be ideal to also meet with the videographer. Every videographer is unique to their skills and personality. Therefore, it makes sense to hire someone that blends in nicely with your family and friends on your wedding day, while they display their creative skills behind a camera.

When hiring a wedding videographer, it is not only vital that you meet with the videographer, but also watch some of their recent wedding video samples. Settling for a three-minute highlight sample is not enough. Don’t be embarrassed and feel free to ask your videographer for more samples of their work. Always pay attention to their style and consistency. Remember that the work of a good and consistent videographer will always leave you wanting more.

Choosing a package that offers minimal hours of coverage.

Your wedding day is the biggest day of your life, and if you’ve hired a wedding videographer. Congratulations, you have made the right choice. But wait, as your day goes by and the main events which are part of your reception are just about to happen, you find out your wedding videographer has fulfilled their hours of coverage and is packing up to leave. This is a common problem and an injustice to the purpose of having the most of your memories captured.

Hiring a wedding videographer for just a few hours of coverage only to save on costs is a recipe for disaster. You need to be honest to yourself – If you went as far as purchasing other beautiful, costly items for your special day, why would you stop at videography? It all comes down to prioritizing within your means.

When deciding on a package, make sure to hire your wedding videographer for as many hours as they are available. The greater the number of hours of video coverage, the better it is for you. Most companies will offer up to sixteen hours. The more hours involved means more memories captured. If you need to cut back on something, try negotiating other items on your package. Never cut back on the length of an edited video and coverage or else some of the most beautiful and cherished moments would simply be lost in the sands of time.


Not coordinating with the photographer.

The more wedding footage, the better. But, mayhem can ensue (and precious shots can get ruined) if there’s no communication between the photographer and the videographer. Ask your videographer if he or she has ever worked with your photographer, and vice versa. If not, ask both parties their typical policies for working with another camera man. If you’ve chosen one but not the other yet, you can also ask them for recommendations.

Not asking about music.

Your videographer might whip up an amazing wedding day compilation, but it’s all for naught if there’s cheesy music attached. Ask about the nitty gritty details, like their editing styles, before you decide if a certain videographer is the one.


Not asking to see a wedding video sample.

If you meet with potential videographers and ask for a sample, they might give you a generic video that showcases tidbits of their work. This is great and all, but it doesn’t give you a whole lot of insight into their specific wedding filming style. Ask to see a complete, edited version of a wedding video they’ve produced to get the full effect. And if they’ve never shot a wedding before, the door’s to the left.

Interfering with the editing style of the wedding videographer.

Most couples feel the entitlement to have their wedding video edited to their preference. While a wedding videographer can give regard to some inputs from the couple, trying to incorporate all the inputs may not create the desired output and result in disappointment for the couple.

An edited video is a lot like a written book. The author will write what they feel and want you to feel in the end. The same can be true when describing a wedding video editor. The editor will personalize your wedding film to the optimum while maintaining a story. Music will play a large part in how the story is told. The moment you decide to interfere and request for your favorite song, that magical feeling and storyline which were once constructed may not look or feel the same again.

When hiring a wedding videographer, never interfere with their choice of editing ideas. You hired them for a reason, and you made them the artist. If you feel the need to share some inspiring ideas, try doing so before the edit. That will save everyone time and spare the headaches later.


Mistakes To Avoid When Choosing Your Wedding Photographer

Thankfully, making sure that your wedding coverage is in the right hands doesn’t have to entail going on some adventure or spending more than half of your wedding budget on a “pro-rated” shutterbug. In this article, we will share with you three mistakes to avoid when choosing your wedding photographer:

Going for the cheapest photographer

Look, I dont like to say it, because it really doesnt hold true 100% of the time, but when it comes to your wedding photography: ‘you get what you pay for’. Going cheap, or asking uncle Bill with his fancy camera to take your photos may seem like a good way to save a few thousand dollars, but you’re more than likely going to regret it after.

Seeing that a wedding is a special event that you’ll never have again in your lifetime, it should make sense that going for a cheaper option is a tragedy waiting to happen. There are stories like this almost monthly on those horrible shows like Today Tonight. It happens, and dont think it wont happen to you.

That said though, you can do your own personal vetting, and you may find some very talented individual on the cheap as they might be startingout or something. I wouldnt risk it though.

During your search, it’s important to note that you should invest a bit more money into a team that has many good reviews, positive testimonials, and engaging shots. Try not to book a photographer without having looked through an entire album of a completed wedding they have done previously.

Not having a meeting before the wedding itself.

Any professional photographer knows the importance of setting up a meeting with a couple before their big day because it gives a chance to iron out any requests and considerations. As a photographer, it also allows me to guage the kind of personality of the couple and work with that in order to produce images that perfectly reflect that couple’s day.

Overlooking the need for a meeting is a mistake to avoid when choosing your wedding photographer because you’ll go into your wedding day without any coordination or proper expectation of how your shots are going to look like.

By meeting up with your chosen wedding photographer, you’ll be able to make sure that you’re both on the same page in terms of style to ensure that they’re getting the shots you’ve always wanted! You can also browse previous weddings the photographer has shot and possibly samples of albums.

Not checking out reviews

An easy mistake to avoid when choosing your wedding photographer is going for the very first option they see without first considering reviews. The beauty of the internet is that you’re able to gain access to many review sources of any wedding vendor written by previous bridal couples. Be sure they are from a reputable source though as some review sites can be exploited with fake reviews.


Most Common Wedding Videography Mistakes:

1) Finalizing the wedding schedule. It’s very important to get in touch with your videographer before finalizing the schedule. There are lots of things to consider when it comes to filming a wedding. Reserve some time for the natural light shots for example is crucial if you want to get an excellent result.

2) Sticking to the schedule. In general, everything should go according to the finalized schedule because even if you decide to cut some parts it can dramatically affect the video crew schedule and capabilities and of course the quality and content of the final video.

3) Relatives who film. Almost in every wedding there is a relative who shoots a separate video for the bride and groom. What may seem as a favor may ruin your professional wedding video. This relative may get in the way and ruin a perfect moment. Professional videographers usually inquire about this and collaborate with your relatives for mutual satisfaction.

4) Focusing on shooting. It’s very important that the video will turn out to be natural rather than acted. Just forget that someone is filming.

5) Striving for perfect video results. Just have fun and enjoy your special day. Things don’t necessarily have to be perfect. That’s the beauty.

Practical Tips To Avoid Getting Duped When Local Moving House

Moving Guide: How To Start Planning for a Move

It’s official: you’ve decided to move. Maybe you got a new job, maybe you sold your current residence or maybe it’s just time for a change. Whatever your circumstances, the moment after you decide to move can be intimidating. It’ll probably dawn on you all at once just how big an undertaking moving can be. How do you even get started planning?

Well… you take it one step at a time! If you’ve just decided to move and have no idea how to start planning, this list is for you. By following these four steps, you’ll go from totally overwhelmed to totally prepared in no time flat. When you’ve got to start planning your move

RESEARCHING YOUR MOVING OPTIONS

First things first: are you going to try to do it all yourself or will you use a moving company? If so, which of the company’s services will you use? Will you require help packing? Transporting heavy, sensitive, or specialty items? Will you need to buy moving supplies and boxes, and can you get them from your mover? Should you invest in a mover protection plan? Will you need storage? Do you have any particular questions or concerns you’ll need an expert to answer?

Don’t panic if you don’t know the answers to these questions yet! Take your time researching and ask all of your questions as you think of them. Ask your moving company for a moving estimate. Our instant, free ballpark estimate factors in the size and distance of the move, as well as any additional services you’re considering. Asking questions and researching is a great first step toward preparing yourself for a move.

MAKING A MASTER MOVING LIST

Whether or not you’re using a moving company, creating a master list will be your next step. We recommend you organize your list room-by-room. Make lists of things you’ll need to move in your kitchen, bedroom, bathrooms, etc., including how and where you’ll pack these items, especially if you’ll rely on a moving service to do some of your packing. Consider creating another list of items to sell or donate. Have there been boxes in the basement you haven’t touched since you’ve put them there? Have your children outgrown clothing and toys? No need to move a lot of items you won’t use in the new home! These lists will come in handy whether you’re moving yourself or hiring a company.


How Much to Tip Movers: The Complete Guide to Tipping Your Moving Company

How much to tip movers might be the last problem to deal with after a day of stress-inducing and crazy-making situations; especially if you just finished a cross country move. You do not want to do is go into your moving day with no idea what the protocol is for tipping movers.

The end of the day could go something like this: The movers only have a few things left in the truck and the moment comes that you have been dreading. Panic sets in, sweat forms on your brow, and your heart starts to race. Yup, it’s time for the tip! No one wants to look cheap or unappreciative, but you don’t want to over tip either. Not that the movers would mind, but you are probably on a budget. Do you give it to one person and let them divide it or hand each person a tip individually? This guide should help you through that stressful moment when it comes.

Do You Have to Tip Movers?!

You might be saying, “Tip? What tip? Don’t they get paid an hourly wage?” Well, yes they do, but so does the casino dealer who deals you a straight flush and the valet person who drives your car a whopping 100 feet to you. Movers are included in the service industry and tipping is the way to show your gratitude.

provide such a valuable service. They are doing something you absolutely don’t want to do. You may not even be capable of doing it. Moving is back-breaking work. Every day, they risk injury. They go home sore, and do it all again the next day. They move in the bitter cold while you watch from inside a toasty window, and they move in the hottest conditions when no one in their right mind should be away from an air conditioner. If anyone deserves a tip, it’s your movers.

How Much to Tip the Movers?

Now we get to the nitty gritty details. Calculating how much to tip movers is, like any other service situation, based on the total amount you are spending and the quality of the move.


Guide to Moving Costs

Moving can be all at once an exciting and stressful time. Packing up all of your belongings, moving them to your new home, and getting settled in a new location can be a lot of work. While hiring a moving service makes the physical act of moving easier, it can come with a different set of stresses. Follow this guide to learn what you can expect to pay for moving and how to hire the right company for the job to ensure your move goes as smooth as possible.

How Much Does it Cost to Move?

The overall size of your home is the largest factor to consider when calculating the cost of your move. The below chart shows the average prices for a move based on average hourly rates charged by local moving companies. This includes the truck rental cost and the hourly rate charged by professional movers. There may be additional services and fees for things like long-distance moving, packing your items for you, storing items, and moving oversized items.

Cost of Moving Other Items (i.e. Cars and Pianos)

If you’re planning on moving large and heavy items, such as a piano, it’s important you realize this can cost you an additional $200 to $1048. If the movers need to use a crane to lift the piano this can cost up to an additional $3,200.

Certain items that are heavy and bulky that take up extra space in the moving truck will also cost more. These items include:

Pool tables

Swing sets

Motorcycles

Lawn tractor

Extra large furniture

If you need to move a car, you will need to hire a separate car transport service. Professional car-shipping companies usually charge based on the distance they need to travel to deliver the vehicle. For short distances, the cost is typically less than $1,300 per vehicle. As for long distance transports, the typical cost is $1,300 to $2,600 per vehicle.


MOVING GUIDE

6-8 Weeks Before Moving:

Make a list of items you plan on moving and items you wish to take to storage. Make a list of items to be handled by a mover (if you plan on using one) and those you will handle yourself. Get rid of items you don’t need – have a garage sale, give items to friends, donate items to local charities.

If you plan on using a moving company, get estimates from several moving companies.

Research and select a professional moving company. After selecting your mover, discuss costs, packing, timing and other necessary details.

Many moving expenses are tax deductible, so maintain a file with important information and receipts for moving related expenses.

If moving to a new community, it’s great to find out about schools, parks, recreation, and community programs prior to your arrival. Contact the local Chamber of Commerce and/or Visitor’s Bureau.

Prepare to transfer medical, property, fire and auto insurance through your insurance agent.

Place all your medical records in a safe place. Do not forget prescriptions, vaccination records and other important information.

4-5 Weeks Before Moving:

If you are planning to do some part of the packing, start collecting moving and packing supplies. These can be purchased from your self storage or moving company.

Contact the post office and fill out a US postal change of address form and provide your new address to your telephone company, trash company, cable / satellite, water, electric company, internet provider, insurance companies, banks and financial institutions, clubs, local government agencies and any other utility companies.

Register your children in their new schools. It would be a good idea to involve kids in the moving process. They can help pack their toys and items from their room.

Contact utility companies – electricity, gas, phone and others for disconnection after your scheduled move out. And call ahead to have utilities connected to your new home.

If you have pets make arrangements for transportation. Find out if there are specific requirements for pet ownership in your new township. Also obtain the veterinarian records.

2-4 Weeks Before Moving

If you have young children, you might want to arrange for a baby-sitter on moving day to ensure they remain safe during the loading process.

Remember to return library books and anything you have borrowed. Collect items you have loaned out.

You may NOT want to pack your valuables in the moving van, think about taking them with you.

Plants – Do you have a safe way to transport your plants? Plants could be given to friends or even a local charity.

If you are traveling by car, you may want to get your car serviced prior to departure.

Start packing items you don’t currently need. If renting a storage unit, determine which items go to storage and which items go to your new home.

Don’t forget anything in basements, attics, and closets. Don’t forget about clearing out safety deposit boxes.

Disassemble your computer and backup important computer files. Avoid exposure to extreme temperatures.

Dispose of flammable items like fireworks, cleaning fluids, matches, acids, chemistry sets and other hazardous items.

1 Week Before Moving

Make sure your items are labeled: ‘fragile’, ‘load first’, ‘load last’, and ‘do not load’. This is important to ensure the safety of your items.

Ensure that your moving company knows the correct address and phone number your new home. If possible, also provide them with an address and phone number to get in touch with you until you get to your new home.

It is important to empty, defrost and clean your refrigerator at least a day before moving.

Make plans flexible, make arrangements in case of delays. Confirm travel arrangements and keep items you will need while the rest of your belongings are in transit.

Pack a box separately with the things you will need immediately upon arriving at your new home. For example- snacks, disposable plates and cups, bathroom items and trash bags.

Moving Out Day

Thoroughly check your closets, drawers, shelves, attic, and garage to make sure nothing is left.

Turn off all the switches and lock all doors and windows.

Be around throughout the loading process. Inspect the premises and see to it that nothing is left behind.

There must be someone to direct the movers. The driver must have in writing your name and phone number. Also remember to take destination agent’s name, address and contact number.

Be patient if you reach your new home before your mover.

Sign the bill of lading and make sure your new address and phone number are correct.


Moving Guide

would like to help make your move less stressful. Below is a week by week moving guide to help with your move. Organizing and preparing weeks ahead of your move will lessen your stress and decrease your chances of overlooking important items.

For help with moving into your storage unit, our locations sell moving and packing supplies. From various sized boxes to locks, packaging tape, and newsprint, we are confident that we have all of the supplies needed for a successful move. For additional questions regarding moving or the supplies sold at our locations, contact us today!

Moving Time-line: 6-8 Weeks Before Moving

Make lists of items you plan on moving to your new home and items you wish to take to storage. Be sure to mark which items are to be handled by the mover and which you will handle yourself.

Dispose of any belongings that you do not need now; consider a garage sale if you have time.

Get estimates from several moving companies.

Research and select a professional moving company. After selecting your mover, discuss costs, packing, timing and other necessary details.

Many moving expenses are tax deductible, so maintain a file with important information and receipts for moving related expenses.

If moving to a new community, find out about the schools, parks, recreation, and community programs from the local Chamber of Commerce or Visitor’s Bureau.

Transfer medical, property, fire and auto insurance through your insurance agent.

Place all your medical records in a safe place. Do not forget prescriptions, vaccination records and other important documents.

Moving Time-line: 2-4 Weeks Before Moving

If you have young children, you might want to arrange for a baby-sitter on moving day to ensure they remain safe during the loading process.

Remember to return library books and anything you have borrowed. Also collect items you have loaned out.

You may NOT want to pack your valuables in the moving van, think about taking them with you.

Plants – some state laws do not allow moving house plants. Plants could be given to friends or perhaps a local charity.

If you are going to travel by car, you may want to get the automobile serviced prior to your departure.

Start packing items you don’t currently need. If renting a storage unit, determine which items go to storage and which items go to your new home.

Don’t forget anything in basements, attics, and closets. Don’t forget about clearing out safety deposit boxes.

Disassemble your computer and back up important computer files. Avoid exposure to extreme temperatures.

Dispose of inflammable items like fireworks, cleaning fluids, matches, acids, chemistry sets and other hazardous items.

Moving Time-line: 1 Week Before Moving

Make sure your items are labeled: ‘fragile’, ‘load first’, ‘load last’, and ‘do not load’. This is important to ensure the safety of your items.

Ensure that your moving company knows the correct address and phone number your new home. If possible, also provide them with an address and phone number to get in touch with you until you get to your new home.

It is important to empty, defrost and clean your refrigerator at least a day before moving.

Make plans flexible, make arrangements in case of delays. Confirm travel arrangements and keep items you will need while the rest of your belongings are in transit.

Pack a box separately with the things you will need immediately upon arriving at your new home. For example- snacks, disposable plates and cups, bathroom items and trash bags.

Moving Time-line: Moving Day

Thoroughly check your closets, drawers, shelves, attic, and garage to make sure nothing is left.

Turn off all the switches and lock all doors and windows.

Be around throughout the loading process. Inspect the premises and see to it that nothing is left behind

There must be someone to direct the movers. The driver must have in writing your name and phone number. Also remember to take destination agent’s name, address and contact number.

Be patient if you reach your new home before your mover.

Sign the bill of lading and make sure your new address and phone number are correct.

Moving Time-line: After The Move

While unloading, make sure there is no damage and no item is missing. Make sure utilities are connected. Carry traveler’s checks or cash for quick payments. Plan out placement of major items in your home. If moving to a new state, you will need to renew your driver’s license and revise will and other legal papers. Locate the hospitals, police stations, and fire stations near your new home.

Choosing The Right Personal Injury Lawyer

Things to Consider When Hiring a Personal Injury Lawyer

Hiring a personal injury attorney is not a decision to take lightly.  The need for a personal injury attorney often comes during a very stressful time in one’s life; you have been injured or grieving the sudden death of a loved one.  Hiring the right attorney can make the process much less stressful and ensure a larger recovery of your damages. The best personal injury attorney is the one that fits your individual needs and whom you trust. Before you hire anyone, here are some important things to consider.

  • Finding a Personal Injury Lawyer: Ask your family and friends for their recommendations, they may know of a personal injury attorney.  If so ask what they thought of the services the attorney provided them. Another excellent source of information is the internet, search online for attorney reviews or to see if the attorney has had any grievances filed against him or her.
  • The Lawyer’s Experience: Personal injury law is broad in scope.  Types of personal injury cases include automobile accidents, bicycle accidents, products liability, worker’s compensation, slip-and-fall, maritime injuries, etc.  A specific area of law may have unique issues which could potentially effect the outcome of your case.  Hiring a personal injury attorney with lack of experience in your specific types of matter could potentially affect your case.
  • References: Potential lawyers will proudly display positive reviews for a job well done. Ask if the lawyer could give you a list of past clients so you can call them as references.  When speaking with references ask if they will briefly talk to you about their case and how the attorney helped them.  Ask the reference what they liked and did not like about the attorney, the more questions and information gathered the better.
  • Statute of Limitations: Statute of limitations limit the amount of time that an injured person can bring a lawsuit. Depending on the type of case you may have little time to file suit to recover for your damages.  If the statute of limitations has passed on your case you may be forever barred from seeking recovery for your injuries.  It is important that if you are injured you seek the advice of counsel immediately.
  • Contingency Fee Agreement: Depending on the value of the case most personal attorneys provide representation on a contingency fee basis.  This means that there are no legal fees without a monetary recover in your case either through settlement or trial.  Typical contingency fee agreements are negotiable but often range from 25% to 33%.  It is important to determine whether the contingency fee will be calculated before or after expenses.

Another consideration is a tiered contingency fee agreement.  A tiered contingency fee agreement could be following: 25% if the case is settled before the complaint is filed; 33.3% if the complaint is filed. Talk to the attorney and discuss what contingency fee options are available to you.

  • Cost of Litigation: Depending on the type of personal injury matter, the costs to prove your case could be very high. Types of costs include expert witnesses, filing fees, depositions, and travel expenses.  Talk to the attorney about who will be responsible for these costs should you lose the case.

Another consideration is whether the attorney can financially support your case.  Products liability and medical malpractice cases can be very expensive depending on the facts and circumstances of the case.  You want to ensure that the lawyer you hire is financially prepared to handle these costs.


Know What a Personal Injury Lawyer Does

First, make sure that you’re aware of what “personal injury” is in a legal context. Not all lawyers are the same! If your sister has gone through a divorce, for example, the lawyer she used may have been a matrimonial or family lawyer, not a personal injury lawyer. Lawyers generally specialize in a particular area of law.

Personal injury attorneys, not surprisingly, specialize in personal injury. Specifically, that means that they specialize in cases involving injuries, wrongdoing, or harm done by one party against the other. The party doing the injury, wrongdoing, or harm can be an individual (such as someone who caused a car accident in which you were injured) or an organization (such as a company that manufacturers defective products, one of which injured you).

The following are specific categories of personal injury:

  • Auto accidents
  • Truck accidents
  • Motorcycle accidents
  • Bike accidents
  • Pedestrian accidents
  • Boat accidents
  • Premises liability (injuries, harm, or wrongdoing in buildings or property)
  • Nursing home negligence
  • Defective products
  • Dog bites


What should I expect from my personal injury attorney?

A client should expect professionalism, knowledge, experience, compassion and understanding. The client should expect their lawyer to have the financial resources necessary to handle the case for as long as it takes. The client should expect their lawyer to have the ability to negotiate a fair settlement, but also the ability, demeanor and skills necessary to litigate the case and go to trial if necessary. The client should expect consistent, easy, and direct communication with their lawyer. The client should expect their lawyer to have the time and ability to sit down and discuss any aspect of the case so that all questions and concerns are addressed.


Interview several personal injury lawyers: ask them these questions…

I have never seen a personal injury attorney in South Florida who does not offer free consultations.

There is no rule saying that you cannot get as many consultations as you want before hiring an attorney.

While I doubt anyone actually has the time or patience to consult with dozens of attorneys, most people have the time and energy to speak with at least three.

You should be asking these questions:

  • Are you speaking with an attorney or a paralegal, investigator, or case manager?
  • If you hire the lawyer, will you get their cell phone number?
  • How many cases does the lawyer have?
  • Will the lawyer be handling the case or a staff-member?
  • Where is the lawyer actually located (not just where they advertise their location)?
  • Will the lawyer meet with you in person? If so, how often?
  • Will the lawyer come to you or does he or she want you to come in to their office?
  • What is the lawyer’s plan for your case?
  • How long will your case take?
  • Can you meet and speak with an attorney before signing a fee agreement?

NOTE: The most important question anyone should ask a potential personal injury lawyer is: what is their average case settlement value? It doesn’t matter what their biggest verdict or settlement is or how much money an entire firm has made over the past twenty-five years. The vast majority of cases are average and the lawyer’s average settlement value across all settled cases is the best way of taking the temperature of a lawyer’s skill. That said, good luck getting a lawyer to commit to telling you their true average settlement number.


Be Prepared to Discuss Attorney Fees and Court Costs

Most personal injury attorneys across the nation, including those right here in NYC, work on a contingency basis. This means that their attorney fee depends on the outcome of your case. A fee is only paid if the lawyer recovers a settlement offer or verdict in your case. In New York, there are strict laws that govern how personal injury attorneys can charge for their services. It’s important to broach this subject and have the attorney explain to you – in plain meaning – what you’ll be expected to pay, and when.

The Lawyer Might Not Take Your Case

Again, just because you’ve scheduled a free consultation and discussed your accident with an attorney doesn’t mean that they’ll agree to take your case. Common reasons for this include:

  • The attorney has a conflict of interest
  • The statute of limitations for your case has expired
  • Your injuries are minor and the projected recovery is too small
  • Your case has been rejected by several other local attorneys, and that’s a red flag
  • You share too much responsibility for your accident and injuries, or
  • The attorney doesn’t regularly handle cases like yours
  • The fit just isn’t right.
  • If a lawyer doesn’t want to take your case, they might offer to refer you to another law office that might be able to help. If they don’t, don’t be afraid to ask for one.

High Quality Circuit Breakers Can Improve Home Safety

A Complete Guide to MCBs

This guide to miniature circuit breakers (MCBs) explains everything you need to know about the types and sizes available. We outline the best brands and explain the function of MCBs in your electrical projects.

What is an MCB?

Let’s start with the basics – just what is a miniature circuit breaker? An MCB is an automatically operated electrical switch. Miniature circuit breakers are intended to prevent damage to an electrical circuit as a result of excess current. They are designed to trip during an overload or short circuit to protect against electrical faults and equipment failure.

MCBs are widely used as isolating components in domestic, commercial, and industrial settings. They form part of a broader family of more powerful circuit-breaking components.

How Does a Miniature Circuit Breaker Work?

Mini circuit breakers are triggered by overcurrent – electrical current that exceeds a designated safe current and makes use of a relatively robust mechanical mechanism designed to minimise failures and false alarms

Excess current causes the bimetallic strip within the MCB to heat, bend, and trip. This releases a switch which moves the electrical contact points apart to confine the arc (electrical discharge). The arc is divided and cooled by an insulated metal strip called the arc chute. The contacts close again once the fault has been fixed and the MCBs are reset.


A GUIDE TO YOUR HOME’S CIRCUIT BREAKER PANEL

Your home’s circuit breaker performs two vital roles. First, it distributes the power coming into your home into circuits that provide electricity everywhere you need it. Next, it protects these circuits from overloads with circuit breakers that interrupt the flow when there’s danger. In this article we’ll examine what circuit breaker panels do, plus when and why you may want to replace or upgrade them.

One of the most crucial parts of your home’s electrical system is one you probably don’t think about very often. That part is the breaker panel, also known as the breaker box or electric service panel. It’s crucial because all the electricity that your home uses flows through this unobtrusive piece of hardware. Properly configured, you’ll probably give it very little thought. But if it isn’t up to the job, you may find its failings very inconvenient, or even find that the safety of your home is compromised.

In this article, we’ll examine what the breaker panel is, how it works, and more. And we’ll look at some of the reasons you may want to have your breaker panel checked by qualified electricians or maybe even have your panel replaced or upgraded. Let’s start by learning the basics of breaker panels.

Your breaker panel is the connection between the power grid outside of your home and the wiring inside. It is the central distribution point that ensures that all the electrical outlets, appliances, lights, heating, and more get the necessary power. Power comes into the breaker panel from the outside through what is known as a service drop, either from buried power lines or power poles. From there the breaker panel splits the power off to branch circuits that power your home.

The term “breaker panel” comes from the circuit breakers that control power to each of the branch circuits leading out of the panel. The circuit breakers perform an important safety function by shutting off power to branch circuits when they detect an overload. That’s why you may have experienced a circuit breaker tripping (shutting off) when you’ve plugged in one too many appliances in your kitchen


The Beginner’s Guide to Circuit Breaker Types

Circuit breakers are an essential part of the modern-day world but not much is known about them by the public. Circuit breakers are one of the most important safety devices in your home, as they regulate the flow of electricity through your house.

Circuit Breaker Function

When electricity enters your home from a power distribution grid, it goes into a circuit breaker box. From there, the current is divided into several circuits, each of which is protected by a fuse or a breaker. The circuits provide power to different parts of your home while the breakers regulate the currents. There are a switch and a moving conductive plate within the circuit breaker, and, when electricity comes into play, the switch is moved by the plate.

Magnetic Circuit Breaker

These types of breakers use an electromagnet, also referred to as a solenoid. The solenoid generates a magnetic field to gauge the strength of the current, which increases with the increasing current. The strength of the magnet, therefore, increases with the force of the current. The magnetic field pulls on a lever within the breaker and, when the current exceeds acceptable limits, the lever forces the switch to flip and cuts the electricity.

Thermal Circuit Breaker

As the name would suggest, thermal circuit breakers use heat to break a circuit. These are found mostly in distribution boards. This breaker employs the use of a bimetallic strip. This strip is made of two different types of metal running side by side that react to heat by expanding and bending. This bending increases with stronger currents and, eventually, the strip bends at an angle and breaks the circuit.

Hybrid Circuit Breaker

The third common circuit breaker is a hybrid. This breaker uses both electromagnetism and heat to detect and regulate currents. This configuration employs both a bimetal switch and electromagnet. The bimetallic strip handles overcurrents and long-lasting power surges. The magnetic component handles the short-circuit currents. This type of circuit breaker is configured to combat quick surges, as well as detect and cut long-term overcurrents.


Guide to a Single-Pole Circuit Breaker

In-home circuit-breaker panels, the standard protection for electrical circuits is provided by either single-pole or double-pole circuit breakers. They are a critical part of the electrical current distribution, providing a safe way to manage branch circuits from the circuit breaker panel.

Circuit breakers fit into the circuit breaker box, usually found in a utility space in your home. They provide a bridge between the main bus bars in the panel that delivers power into your home from the utility company and the circuit wires that run through your home. The circuit breakers are where the hot wires for each circuit are connected.

Their Function

These devices monitor the amount of current being drawn by appliances and lighting fixtures along the circuit and “trip” to shut down the circuit whenever the load becomes high enough to overheat the wires. Further, circuit breakers trip whenever they sense a short circuit or ground-fault that can pose a potential hazard.

Circuit breakers also offer a convenient place to shut off current to a circuit in order to make repairs or replacements to any of the fixtures served by it. The switch on the front of the circuit breaker can easily be flicked off to render a circuit momentarily dead. If the circuit breaker trips, restoring power is an easy matter of resetting the lever. Make sure, though, to address the overload or circuit problem that has caused the circuit breaker to trip in the first place.

Single-Pole vs. Double-Pole

Single-pole circuit breakers supply 120-volt power to circuits, while double-pole circuit breakers supply 240 volts. Most of the light fixtures and ordinary plug-in outlets in your home are served by single-pole 120-volt breakers, while heavy appliances and utilities, such as clothes dryers, whole-house central air conditioning, and electric ranges, are served by 240-volt double-pole breakers.


Circuit breaker

A circuit breaker is an automatically operated electrical switch designed to protect an electrical circuit from damage caused by excess current from an overload or short circuit. Its basic function is to interrupt current flow after a fault is detected. Unlike a fuse, which operates once and then must be replaced, a circuit breaker can be reset (either manually or automatically) to resume normal operation.

Circuit breakers are made in varying sizes, from small devices that protect low-current circuits or individual household appliance, up to large switchgear designed to protect high voltage circuits feeding an entire city. The generic function of a circuit breaker, or fuse, as an automatic means of removing power from a faulty system is often abbreviated as OCPD (Over Current Protection Device).

Its purpose was to protect lighting circuit wiring from accidental short circuits and overloads. A modern miniature circuit breaker similar to the ones now in use was patented

All circuit breaker systems have common features in their operation, but details vary substantially depending on the voltage class, current rating and type of the circuit breaker. The circuit breaker must first detect a fault condition. In small mains and low voltage circuit breakers, this is usually done within the device itself. Typically, the heating or magnetic effects of electric current are employed. Circuit breakers for large currents or high voltages are usually arranged with protective relay pilot devices to sense a fault condition and to operate the opening mechanism. These typically require a separate power source, such as a battery, although some high-voltage circuit breakers are self-contained with current transformers, protective relays, and an internal control power source.

Once a fault is detected, the circuit breaker contacts must open to interrupt the circuit; this is commonly done using mechanically stored energy contained within the breaker, such as a spring or compressed air to separate the contacts. Circuit breakers may also use the higher current caused by the fault to separate the contacts, such as thermal expansion or a magnetic field. Small circuit breakers typically have a manual control lever to switch off the load or reset a tripped breaker, while larger units use solenoids to trip the mechanism, and electric motors to restore energy to the springs.

Tips To Minimize Your Risk As A Buyer By Finding The Right Home Inspection

Preparing Your Home For An Inspection

The perfect home simply doesn’t exist. Why? Well, in a brand new home, the contractor often is not aware of shortcuts taken by his subcontractors, and government building and code inspectors do not have the time or the budget to inspect everything in every home, so most government inspectors simply do a spot-check of homes in new subdivisions. A home that has been lived in usually has damage that occurred from simply living in it, or additions or remodeling that weren’t permitted. That’s why buyers need a professional home inspection.

The purpose of a home inspection is to document the overall condition of the property at the time of the inspection and to ensure that its major systems and components (water heater, heating and cooling, plumbing, electrical, etc.) are installed properly and working properly. The home inspection is not a warranty since the home inspector is only there for a couple of hours and never saw the home or its systems being built, so he has no idea about any quality control processes. While some items identified during the course of a home inspection might seem like minor items individually, collectively they could add up to major headaches involving both time and money. If sellers know what to look for, they can resolve many minor items before the buyer’s home inspection.

EXTERIOR:

Make sure all the dirt and landscaping material is away from the siding of the house.  There should be 4-6 inches of clearance beneath the siding of the house.

Plant growth should be cut back away from the house at least 10-12 inches.

Any stored items should be moved as far away from the structure; stored firewood in particular should be moved as far away from the house as is reasonable.

Check the siding and trim for any damages and repair as needed.

Repair any missing caulking around doors, windows and over nail heads.

Make sure all exterior doors and door knobs/deadbolts are operating properly.  You may wish to repair any damaged weather stripping.

ROOFING & GUTTERS:

Clean all moss and debris off the roof.  Use a pressure washer only if absolutely necessary.  A broom or blower is preferred.

Repair any damaged or missing roofing.  Avoid using mastic or caulking as a repair as it is considered a temporary repair only and may be called out by the inspector.

Clean out gutters and repair any damages to the gutters such as rust through or sagging.

Make sure all downspouts are properly diverted away from the house, either with elbows and splash blocks or drain lies.

GARAGE:

Check the garage door opener and adjust it as needed so it properly reverses against pressure.

Make sure the garage door itself is operating properly and repair as needed.

If the home is newer with solid core, self-closing door to the interior, make sure the door closes and seals properly by itself, with the weather stripping intact.

KITCHEN, UTILITY, & BATHROOMS:

Check for leaks under the sinks and around the faucets, repairing as needed.

Look for possible floor damage around toilets and adjacent to tubs and showers.  If found, damages may need further evaluation by a contractor.

Make sure that all grout and caulking is in good repair.  This includes tub and shower surrounds along the floor in front of tubs and showers.

Check to be sure all fixtures, fans and appliances are working properly.

INTERIOR & ATTIC:

Check interior doors and windows to make sure they are operating properly.  This is particularly important for bedroom windows.

Make sure smoke detectors are in place and functional.

Remove any stored items from the attic space.  Check to be sure all fan ducts are properly connected and venting outside the attic space.  Repair if not.

ELECTRICAL:

Make sure all light switches are functional and any burned out lights are replaced.

PLUMBING:

Check your water heater for any leaking or damage.  If present, repair or replacement may be needed.

If missing, install proper rated earthquake strapping to water heater.

Make sure the water heater pilot light is on.

Repair any plumbing leaks found in the crawl space.

HEATING & COOLING:

Inspect your furnace filter and change, or clean, if dirty.

Regarding air conditioning, make sure all debris is cleaned away from the exterior compressor.

Regarding a gas-fired appliance, which utilizes a pilot light, such as a gas log fireplace or older furnace, make sure the pilot light is on.  The pilot light may have been turned off for the summer or if the house has been vacant.

CRAWL SPACE:

Remove any wood, concrete, form wood and cardboard debris.

Remove or replace any damaged, fallen floor insulation.

Make sure crawl space is fully covered with plastic.  Only use 6 mil black plastic, if adding more.

Reconnect any disconnected heat ducts.

Repair any damaged foundation vent screens and make sure all foundation vents are clear.  Use only 1/4 inch galvanized hardware cloth for repair.  Don’t use any louvered type vents.


Negotiation Tips for Buying a Home After a Home Inspection

Chances are that you have stumbled across this article because you are looking for negotiation tips for buying a home and you are in the process of doing so. Buying a home can be an incredibly exciting yet scary time and negotiating with the seller can seem nerve-wracking and feel intimidating. However, this guide is meant to help demystify the process of negotiating with the seller when you are looking to buy a home after you receive the report from a home inspector.

Home inspectors are charged with describing the home’s present physical condition and indicating in their report which components, parts, and systems might require major repairs or need to be replaced altogether. No matter what an inspector discovers during a home inspection, a home cannot technically pass or fail an inspection.

We would be remiss if we did not explain how a home inspection differs from a city or municipal inspection since these inspections are meant to help determine whether or not a home is in compliance with local housing and building codes. Additionally, a home inspection is distinct from an appraisal, because an appraisal is meant to determine a home’s fair market value

Common Issues Uncovered With Home Inspections

The following are issues that frequently show up during home inspections so do not be surprised if you see them listed in the report you receive from your home inspector.

Issues With The Heating Ventilation Air Conditioning (HVAC) System

Common HVAC problems might be related to maintenance, outdated or incorrectly sized systems. Your general home inspector should be able to give you an idea about the age of the existing HVAC system. But if you are looking to learn more about the HVAC system, the condition it’s in, whether or not it has any issues, how much it might cost to replace, and how much longer it might last, you would need to hire an HVAC specialist to inspect your HVAC system and do a separate HVAC inspection.


A Seller’s Guide to the Home Inspection Process

For sellers (and first-time sellers in particular) home inspections can be frightening. What will the inspector find? What impact will a potential defect have on the sale price? Will the seller back out? Am I being treated fairly? These are questions everyone asks, so you shouldn’t be alarmed.

You can’t choose things you can control, but there are certain facets of the process you can influence. In the guide below, we’ll explain what the home inspection process entails, how you can prepare your home for the inspection, and what to do if you get negative results.

An Overview of the Process

The challenge of the home inspection process is that so much rides on the outcome. The seller is almost always biased; he or she believes the residence is in better condition than it probably is. However, no buyer wants to purchase a house that has certain defects and issues. “There’s a huge psychological dynamic that happens in this whole process,”

“The buyers are making a big purchase and they’re obviously going through a whole host of emotions, and then you’ve got the inspector there, and it’s their job to deliver up to the buyer’s expectations. There could be problems the seller isn’t even aware of that could impact someone’s decision to buy the house.”

To give an idea of what the process looks like, here’s how home inspections tend to roll out:

  • The buyer places an offer and the seller accepts.
  • The buyer’s offer is likely to be contingent on the home passing a certified inspection.
  • In most cases, the buyer’s lender will order the home inspection.
  • The home inspector will set up a time with the seller that works for his or her schedule.
  • The actual inspection lasts between three and four hours, and the inspector will examine both the interior and the exterior of the home.
  • The inspector isn’t looking for perfection. Normal wear and tear is expected for any home that’s a few years old. What the inspector is looking for are serious issues that may affect the safety, functionality, or overall appearance of the home.


Home Inspection Checklist: Your Guide to Getting the Most from an Inspection

Your home inspection is a great opportunity to understand the condition of the property you’re buying. You’ll have a professional home inspector as your guide, but it’s helpful to have an idea what to look out for. Both you and your real estate agent should attend the inspection so that you can follow along and learn about your new home

We’ve put together a handy home inspection checklist to give you an idea of what to expect. Roof: Let’s start from the top, literally. The inspector will look at the condition of the roof. If he notes that it may need to be replaced soon, you may want to negotiate with the seller to take this into account. Foundation: At the opposite end of the house, the inspector will look for cracks in the walls both inside and out that could indicate problems with the foundation. Electrical System: Do the switches work? Is the wiring up to code? Fans, light fixtures, circuit breakers and outlets will also be eyed. Plumbing: Visibly damaged pipes or leaking pipes are a red flag. The inspector will also check to make sure the hot water works and the toilets, sinks, and showers are functioning. Lawn: Drainage is a key issue here. Driveways and sidewalks are also on the list. Heating and Cooling Systems: These will be checked for functionality and safety. Appliances: If these come included, the inspector will note their age and condition. Exterior: How does the paint or siding look? Are the gutters firmly attached? Do exterior lights work? Basement and Attic: These will be checked for any signs of leaks or dampness. Insulation and ventilation will also be checked

Once you’ve finished the tour, the inspector will send you a detailed inspection report. If it does uncover significant problems, you can always go back to the seller to ask to negotiate repairs. Almost any home will have some small issues, so focus only on the most significant ones that could be costly. Major foundation issues or a roof that need replacing are high on that list. And remember, your inspector can’t catch every single thing that could be going on with your house.

He won’t, for example, peel up carpeting or look behind walls. Things like toxic mold also aren’t on his list. But you can often catch many of the most important issues with your house by hiring a good inspector and paying close attention to both his tour and follow-up report, using this home inspection checklist as your guide.

Disclaimer: The above is provided for informational purposes only and should not be considered tax, savings, financial, or legal advice. Please consult your tax advisor. All calculations and information shown here are for illustrative purposes only. All third parties listed above are for demonstration purposes only and are not affiliated


Must-Know Home Inspection Tips for Buyers

If you’re buying a home, it’s always best to get the home inspected before you close the deal. While the inspection will probably reveal more than a few defects, it doesn’t mean its an immediate deal-breaker. Here’s how inspections work and next steps on how to move forward after you have one.

In almost every situation, it is advised that anyone buying a home first request a whole home inspection prior to closing. It’s important to understand what is — and isn’t — included in a home inspection and your options for moving forward if — or more likely, when — defects are found.

How Home Inspections Work

When you decide to have the home you’re buying inspected, you get to choose which company you use. If you don’t have a reliable one in mind, your real estate agent likely has a company they use frequently and would recommend. As the buyer, you pay for the inspection and are able to (and encouraged to) attend the inspection in person.

The standard inspection evaluates the condition of the homes heating and air systems, interior plumbing and electrical, roof, walls, ceilings, floors, windows, doors, foundation, and structure. Plus, you may want to (or be required to) get additional inspections for things like pests, or radon. The report provided to you after the inspection should include detailed descriptions and photos of any defects.

Fixes You Can Make Yourself

It is rare that a home inspector finds absolutely nothing wrong with the house. In fact, if this is the case, you may question the thoroughness of the inspector. Finding some problems doesn’t automatically mean you shouldn’t buy the house, only that you may need to be address the defects down the road.

How To Choose The Right Tax Preparation

What to do when your tax preparer screws up

Tax return mistakes are often accidental, like when a client tells the preparer a wrong amount, or the preparer calculates incorrectly. Other times, mistakes are downright deceitful (think: inflating deductions to get a client a bigger refund or omitting information to maximize the federal earned income credit).

Though enrolled agents, CPAs and tax attorneys are governed by standards of professional responsibility and IRS ethics, more than half of the 79 million returns filed by paid tax preparers are not bound by those rules.

Taxpayers can take a few steps to protect themselves from lengthy IRS and state agency battles and pricey penalties, if they’ve been bamboozled by a preparer

Don’t sign the return without carefully reviewing it

At the end of your tax return, there is a statement that under penalty of perjury, the taxpayer believes the information to be true and accurate.

This can hurt you when it comes time to defend your return if there is a serious mistake. If you don′t understand something or think it may be incorrect, ask the preparer to explain or correct it before signing.

Use a licensed professional

Anyone can legally prepare a tax return for compensation as long as they have a Preparer Tax Identification Number from the IRS, which costs $50 and takes 15 minutes to obtain.

Earlier this year, the Senate Finance Committee passed legislation designed to help curb identity theft and tax refund fraud, but an amendment containing recommendations for protecting the public from incompetent and fraudulent tax preparers, including requiring unlicensed PTIN holders to inform taxpayers about the differences between preparers, was shot down

Pay a flat fee

Avoid tax preparers who offer to take a percentage of your tax refund, rather than a flat fee, Ambrose said. They are incentivized to boost deductions where they may not be accurate or legal, and are eventually caught by the IRS.


Avoiding the Bad Apples

To avoid having these sorts of problems with a tax preparer, research candidates before selecting one. If possible, get referrals from people you know who can vouch for their abilities and ethics. In addition, the IRS offers a directory where you can look up professionals with specific credentials, such as attorneys and certified public accountants.

And keep in mind that just because you’re hiring someone else to do most of the numbers-crunching and box-checking, it doesn’t mean you should take a totally hands-off approach to your tax return. Ultimately, it’s your responsibility—and you’re the one on the hook for any taxes and penalties that arise from an inaccurate return.3 Make sure you review everything carefully, from the figures to the particular forms, before signing your name on that dotted line.


Can I Sue A Tax Preparer?

Suing a tax preparer is often the last resort since the taxpayer would have to incur significant legal fees. However, if the amount in question is substantial, taking the matter to the court may provide relief from undue taxes and fees. Moreover, if the tax preparer is not registered by the IRS or state-licensed, the only recourse is legal action

You can file a standard professional malpractice complaint with the state court in your jurisdiction.

To avoid dealing with these problems, it is best to research the candidates and find one that suits your needs. For example, if you’re dealing with complex financial situations, you may need regular consultations. IRS has a website where you can find professionals with valid credentials who are up to the task.


Choose return preparers wisely

It is important to choose carefully when hiring an individual or firm to prepare a tax return. Well-intentioned taxpayers can be misled by preparers who don’t understand taxes or who mislead people into taking credits or deductions they aren’t entitled to claim. Scam preparers often do this to increase their fee.

Here are a few tips to consider to help avoid fraudsters:

Look for a preparer who is available year-round. In the event questions come up about a tax return, taxpayers may need to contact the preparer after the filing season is over.

Ask if the preparer has an IRS Preparer Tax Identification Number (PTIN). Paid tax return preparers are required to register with the IRS, have a PTIN and include it on tax returns.

Inquire whether the tax return preparer has a professional credential (enrolled agent, certified public accountant or attorney), belongs to a professional organization or attends continuing education classes. Because tax law can be complex, competent tax preparers remain up-to-date on tax topics.

Ask about service fees. Avoid preparers who base fees on a percentage of their client’s refund or boast bigger refunds than their competition. Don’t give tax documents, Social Security numbers or other information to a preparer if merely inquiring about their services and fees. Unfortunately, some unscrupulous preparers have used this information to improperly file returns without the taxpayer’s permission.

Make sure the preparer offers IRS e-file and ask to e-file the tax return. Paid preparers who do taxes for more than 10 clients generally must file electronically. Since electronic filing began in the 1980s, the IRS has processed more than 1.5 billion e-filed individual tax returns. It’s the safest and most accurate way to file.


Letters to Preparers

Another tier in our outreach and educational efforts is sending letters to specific preparers. We look at the number of returns with a high likelihood of refundable credit and HOH filing status errors completed by the same preparer. And, we send letters to preparers who have a high number of these returns. We send letters based on the previous filing season before the next filing season starts and we send letters during the filing season for the current year.

The letters:

  • State we believe the preparer completed inaccurate claims,
  • Highlight the consequences of preparing inaccurate claims,
  • Outline preparer due diligence responsibilities,
  • Provide tips on preparing accurate returns and point to online refundable credit and hoh filing status tools, information and other resources, and
  • Inform preparer that we are monitoring their future returns.

Useful Eye Care Tips For Women Of Any Age

Most Common Eye Problems – Signs, Symptoms and Treatment Options

Diabetic Retinopathy

Diabetic retinopathy is basically a diabetes complication, which affects eyes by causing damage to the blood vessels spread throughout the light sensitive tissues of the retina (the back of the eye).

Anyone having type 1 or type 2 diabetes can develop this eye condition, especially those who have diabetes for a long time with fluctuating blood sugar levels. Usually, both eyes get affected by diabetic retinopathy.

Signs and Symptoms of Diabetic Retinopathy

There might not be any noticeable symptoms through the early stages of this eye condition. When it progresses to later stages, following symptoms might appear eventually:

  • Dark spots or strings floating through your vision (floaters)
  • Impaired color recognition
  • Fluctuating vision
  • Blurred vision
  • Vision loss

Treatment Options

There is no reliable way to cure retinopathy once it has progressed to advanced stages. However, photocoagulation (laser treatment for retinopathy) comes really handy in preventing vision loss if chosen before retina being severely damaged.

Another treatment option for diabetic retinopathy in its earlier stages is vitrectomy, a process through which vitreous gel is surgically removed while retina has not been severely damaged.


Dry Eyes Syndrome

One of the functions of tears is to keep your eyes lubricated, and when they fail to provide adequate lubrication for the eyes, you are being affected by dry eye syndrome. From your body being unable to produce enough tears to production of low quality tears, there can be a host of reasons behind inadequate lubrication for your eyes.

You can experience stinging or burning sensation when you have dry eyes, which can be experienced under certain situations, such as in an air-conditioned room, while traveling on an airplane or looking at a computer screen for a long time without any breaks.

Signs and Symptoms of Dry Eyes Syndrome

  • A burning, scratchy or stinging sensation in eyes
  • Eye redness
  • Sensitivity to light
  • Mucus production in or around the eyes
  • Blurred vision
  • Eye fatigue
  • Issues in wearing contact lenses

Treatment Options

Different treatment options can be used for dry eyes syndrome depending upon the reason behind the eye problem. Some most commonly used treatment options include:

  • OTC (Over-the-counter) topical medications: These can be used when your dry eyes syndrome is mild in nature. Artificial tears, gels and ointments can be some of the commonly used OTC medications to treat mild dry eyes.
  • Prescription Medications: FDA approves only ‘Lifitegrast’ and ‘Cyclosporine’ as prescription dry eye medications. To deal with eye inflammation, ‘Corticosteroid’ eye drops may also be prescribed as short-term treatment.
  • Devices: There are also some FDA-approve devices that serve to temporarily relieve you from dry eyes by stimulation of nerves and glands responsible for tear production.
  • Surgical Options: Your eye care professional may resort to insertion of silicone-based punctal plugs to partially or completely plug tear ducts through the inner corners of your eyes to ensure tears aren’t draining from the eye.
  • Lifestyle Changes: Lifestyle based enhancements also prove helpful in dealing with dry eyes syndrome. Taking periodic breaks or cutting your screen exposure can be really helpful. Avoiding warmer temperatures also helps in doing so.


What Is Photodynamic Therapy For Age-Related Macular Degeneration?

Photodynamic therapy is a treatment for the eyes. It uses a laser and a special medicine that works when exposed to a certain type of light. It is done to treat age-related macular degeneration (AMD). AMD is a condition that can lead to loss of vision.

The retina is the layer of cells in the back of your eye that converts light into electrical signals. Your retina then sends these signals to your brain. AMD affects your macula. The macula is the sensitive, central part of your retina. This area is responsible for your detailed, central vision. AMD damages your macula. The macula may become thinner as a result. Blood vessels may start growing beneath your retina. This can cause fluid to leak beneath your macula. This excess fluid can lead to vision loss.

Just before the procedure, an eye doctor injects a medicine into a vein in your arm. This medicine is sensitive to light. It collects in the abnormal blood vessels under your macula. You are then given an anesthetic eye drop. Using a special contact lens, the eye doctor then shines a laser into your eye. The light from the laser activates the medicine. The medicine then creates blood clots in your abnormal blood vessels. This seals off the vessels. This can help prevent more vision loss.

Why might I need photodynamic therapy for age-related macular degeneration?

Photodynamic therapy is one type of treatment for AMD. AMD is a common cause of significant loss of eyesight in older adults. Rarely, it can lead to total blindness. Because it affects your macula, you may still have your side (peripheral) vision if you have AMD. It may cause a sudden or gradual loss of your central vision.

AMD comes in two main subtypes: dry type and wet type. Abnormal blood vessel growth is present in only the wet type. Photodynamic therapy is recommended only as a possible therapy for the wet type of the disease.

Photodynamic therapy can’t restore vision that you have already lost. But it may slow down the damage to your central vision.

Photodynamic therapy is an option only for certain people with wet type AMD. It may be advised if your vision loss comes on slowly over time, instead of suddenly. The treatment is used less often now that there are new drugs to decrease abnormal blood vessel growth. But your healthcare provider may advise the therapy in addition to these new drugs.


Inflammation of the eye

When the eyes are inflamed, they become red, swollen and can water. Frequently, the eyelids stick together.

Impaired vision can encourage the development of dry eyes.

Inflammation of the eye often results from an infection by viruses or bacteria. But inflammation of the eye can also be nonspecific. Different clinical pictures are distinguished depending on which parts of the eye are affected. It is advisable to visit your eye doctor because inflammation of the eye can also progress to a severe form.

Symptoms of eye inflammation

When an eye is inflamed, it entails an inflammatory process around the eye. It can affect different parts of the eye. The term “inflammation of the eye” serves as an umbrella term for the various inflammatory diseases. Different symptoms and complaints are prevalent depending on the clinical picture. In rare cases, there can be a serious disease present which is a threat to the eyesight.

Most commonly, inflammation affects the conjunctiva, followed by the cornea and the eyelid.

Many symptoms of eye inflammation overlap with those of dry eyes. These include:

  • Redness
  • Itching
  • Burning
  • Foreign body sensation
  • Watery eyes
  • Swelling

On top of that other, more specific symptoms can occur:

  • Pain
  • Eyelids sticking together
  • Clouding of vision
  • Sensitivity to light
  • Secretion of pus

A purulent discharge is a sign of bacterial infection. Some people affected suffer from severe pain and a significant reduction in vision.

Causes of eye inflammation

Eye inflammation can be traced back to numerous different causes. Infections due to bacteria, viruses or fungi are the main causes. The eyes are one of the ports of entry for pathogens in the human body. They put up a fight against the “invaders” on a daily basis, but when there is inflammation, the germs have outsmarted the immune defence system.

Dry eyes are particularly susceptible to eye inflammation. The eye’s immune system has only a limited effect when the tear film is impaired. In such conditions, pathogens can gain access more easily and cause inflammation. Dry eyes can be cared for with lubricating eye drops which can also help to reinforce the protective barrier against germs.

Further reasons for eye inflammation are allergic reactions such as hay fever, autoimmune diseases and environmental irritants such as draughts, dust particles or sunshine. Mechanical irritants, like when an eyelash grows into the eye, can also result in inflammation of the eye.


Conjunctivitis (Pinkeye)

Conjunctivitis, also known to many as pinkeye is a condition that inflames the tissues lining the back of your eyelids and covering your sclera (conjunctiva). As a result of this, your eyes can turn itchy, red, blurry, teary and discharging, sometimes also giving you a feeling that something is in your eyes. It is also one of the most commonly prevailing eye problems.

Though it is highly contagious (readily affecting children), but rarely serious, quite unlikely to damage your vision, more so when identified and treated early.

Types of Conjunctivitis

Conjunctivitis is categorized into three main types:

  1. Allergic Conjunctivitis
  • Allergic Conjunctivitis: Mostly affects people already suffering from seasonal allergies, when they contact with something that triggers an allergic reaction within their eyes.
  • Giant Papillary Conjunctivitis: Caused due to long term presence of a foreign body in an eye, affecting people wearing hard or rigid contact lenses or the soft ones not being replaced frequently.
  1. Infectious Conjunctivitis
  • Bacterial Conjunctivitis: This is the type of eye infection caused mostly by streptococcal or staphylococcal bacteria that’s transferred to your eyes via your own respiratory system or skin.
  • Viral Conjunctivitis: Contagious viruses thriving in common cold are mostly responsible for spread of this type of conjunctivitis, thus affecting people by exposure to the sneezing or coughing of someone suffering from an upper respiratory tract infection.
  • Ophthalmia Neonatorum: One of the most severe forms of bacterial conjunctivitis specifically affecting newborn babies, also capable of causing permanent eye damage if not treated immediately.
  • Chemical Conjunctivitis

This spreads as a result of exposure to noxious chemicals, chlorine in swimming pools or even air pollution.

Signs and Symptoms of Conjunctivitis

  • Redness appearing in the eyelid or through the white of the eye
  • Swelling in the conjunctiva
  • Excessive tearing
  • Thick yellowish discharge, mostly covering whole eyelashes, especially after sleep
  • Itching and burning eyes
  • Blurred vision
  • Extra sensitivity to light

Treatment Options

Appropriate treatment options for conjunctivitis vary depending upon the cause of this eye condition.

  • Allergic Conjunctivitis: It must start with avoiding exposure to the irritant(s). Artificial tears and cool compresses suffice in case of mild intensity of the disease. Antihistamines or non-steroidal anti-inflammatory drugs may be prescribed in case of severe allergic conjunctivitis. And for people with persistent allergic conjunctivitis, topical steroid eye drops may be the appropriate option.
  • Bacterial Conjunctivitis: Antibiotic eye drops or ointments work well for this type of conjunctivitis, mostly requiring 3 to 4 days of treatment for reasonable recovery. However, it’s highly recommended that patients complete the entire course of antibiotics to totally avoid recurrence.
  • Viral Conjunctivitis: Viral conjunctivitis cannot be treated with drops, ointments or some antibiotics until the virus runs its course like common cold. This may take up to about 2-3 weeks.
  • Chemical Conjunctivitis: The standard treatment for chemical conjunctivitis includes thorough flushing of the eyes using saline water. In some cases, people might need to go for topical steroids.

Pet Snake Care

How to Get Rid of a Rattlesnake

This page is an expert guide on getting rid of a Rattlesnake from your yard using the products and methods suggested by our experienced pest control specialists. Follow this guide and use the recommended products and you will eliminate the threat of Rattlesnake activity around your yard.

Snakes of any kind finding themselves on your property is alarming but encountering a Rattlesnake can be downright frightening. Rattlesnakes are a dangerous snake species and quite an unfriendly intruder to run into. If one happens to come close to you to strike, not only can the Rattlesnake bite be painful, it can also be life-threatening.

there has been an increase in Rattlesnakes moving in toward buildings and structures due to seasonal conditions being conducive to Rattlesnake being on the move to forage for meals. Normally, if a Rattlesnake is discovered on your property, it is advised to contact animal control to handle the situation. However, there are things that you can do to protect your home against a Rattlesnake intrusion

Before you can carry out a treatment approach, you need to be sure you are dealing with a Rattlesnake and not some other animal. Misidentification can lead to using the wrong treatment methods, which may end up being a waste of your time and money

Below, we will cover what Rattlesnakes look like so you can properly identify them:

Rattlesnakes are reptiles that are found throughout North and South America and are a distinctive species of snake.

They have large thick bodies ranging from one to eight feet long and unique features like their scaled skin which comes in various colors and patterns. These scales look like a series of diamonds or hexagons overlapping one another. Most of the time, Rattlesnakes are colored with subtle earth tones which help to camouflage the snake.

Rattlesnakes have a triangular head, a forked tongue and fangs which can inject poisonous venom.

The most unique trait of the Rattlesnake is how it got its name which is the rattle at the end of their tail. Rattlesnake uses this rattle, which consists of interlocked segments or rings of keratin, to warn enemies.


How Do I Get Rid of Snakes

There are many types of snakes, some are poisonous and dangerous while others are quite harmless. Most people do not want to see snakes in or around their home and they want to know more about how to prevent or deter snakes from entering their yard and being near their home

How Can I  Prevent Snakes In My Home? How Do I Protect My Home From Snakes?

Seal up cracks in your home and add weather stripping to fill in gaps around doors and windows

How Can I Prevent Snakes In My Yard?

Keep your grass cut short with regular mowing and remove any bushes or shrubs that are close to your home

If you store wood in a pile this can be a really good hiding place for snakes. Be careful when you remove wood from a pile because if there is a poisonous or aggressive snake it can be startled and strike.

Keep your wood pile several inches above the ground if possible.

Keep compost in a sealed container so as to not attract rodents which in turn will attract snakes

What Are Some Home Remedies For Snake Problems?

Install a “perch pole” where predatory birds can sit and grab a snake if they see one in your yard;

Patch holes in your house foundation if you have any;

Get rid of pests such as mice that can be an attractant to snakes as a food source;

Add mesh hardware cloth around your home to prevent snakes from getting close to your home.

Add hog fuel or other rough landscaping materials to your garden.

Snakes don’t like to move through this type of material as it can hurt them.

Plant marigolds around your home, they tend to deter snakes.

How Can I Get Rid Of Snakes?

Get rid of snakes. has many effective snake repellents and deterrents. Take a look at our selection of products which can help to deal with your snake issues once and for all


Guide to a Snake Free House

this would not be a crisis. But, then again, we are not often considered normal. Getting a snake out of a house and keeping a snake from enetering a house are two very different situations.  We’ll first discuss keeping the snakes out. Snakes enter houses in a variety of ways but there are three entry points that we often encounter on snake removal calls. The first is laundry rooms, the second is under kitchen sinks and the other most common entry point is right through your front door.

Your Laundry Room – Clothes driers have large exhaust hoses that attach to the rear of the appliance and lead through the wall to the outside where the hot air is expelled. Over time, these exhaust hoses can become worn and develop cracks. As a mouse approaches your house from the outside and finds the exhaust vent it can easily make entry into the hose

The mouse then walks through the crack in the hose and onto the floor of your laundry room. If there is no crack, the mouse can quickly and easly chew a hole. As we discussed in “Guide To A Snake Free Yard”, snakes follow scent trails of food sources and most snakes love mice. Check your drier exhaust hose to make sure it’s intact. Also, examine the exhaust vent on the exterior of the house. Insure that the vent is secure and has a cover that does not allow pests to gain access.

Your Kitchen Sink – If your house is on a concrete slab then this may not apply to you. If you have a crawl space then pay attention! When your house was constructed, holes were put in the floor or the wall underneath your kitchen and bathroom sink. Once the holes are made, the plumbing pipes are inserted. If the hole is not properly sealed around the pipe then guess what can get inside! If the pipes were properly sealed when the house was built, make sure it is still in good shape and hasn’t been chewed away by a rodent attempting to gain entry.

Your Front Door – Snakes are excellent at picking locks and crawling right in through the key hole. (I wonder how many people will actually believe this:) Actually, snakes can easily crawl under doors. The good news is, you can easily prevent it! During daylight hours while standing inside your house, shut your entry door and look to see if daylight is visible underneath. If you can see daylight peeking in then so can a snake. Simply replace the weather stripping underneath the door. Any local hardware store can help you correct any of the above problems.


How To Remove Snakes From Your Property

While most snakes do not pose a threat to humans, there are venomous species that can do serious harm if they bite you. Whether venomous or not though, your first thought when you spot a snake in your yard is likely “how do I get rid of it?” Snake control is a serious matter that should be approached with the utmost caution.

HOW TO GET RID OF SNAKES

Snakes tend to be wary creatures and try to avoid exposure, though they do sometimes warm their cold-blooded bodies on rocks and other surfaces that heat up on sunny days. You are most likely to come across a snake in uncultivated areas of your yard and around shelters, such as piles of firewood, rocks, or brush. Most will move away as quickly as possible when they see you – even the venomous types prefer to escape rather than attack. Still, the safest choice is for you to get away from any snake rather than confront it.

Remove Attractants

The primary reason snakes make their home in your yard is because they’ve found easy access to prey. Because rodents are a prime food source for many snakes, often the presence of snakes correlates with the presence of mice and rats. By keeping your home rodent-free, you have a better chance of keeping snakes out. Use traps and repellents to eliminate rodents before they entice snakes to come to dinner. Also, be sure to clean up birdseed, pet food, and other food attractants.

Eliminate Outdoor Shelter

Snakes need undisturbed places to hide. Snakes generally like cool, damp, dark areas where they can find food. They are often attracted to stacked firewood, old lumber piles, junk piles, flower beds with heavy mulch, gardens, unkempt basements, shrubbery growing against foundations, attics, stream banks, and unmowed lawns. Mow areas where grass and weeds grow tall and clean up piles of debris around your yard. Snakes also make use of burrows dug by other animals, so fill any you find with soil or stones.

Make Your Home Inaccessible

Snakes will even enter your home if they can find a way in, and nobody wants that! Keep these slithering creatures out by blocking off all possible entryways. Keep in mind that snakes can slip through gaps and cracks 1/4″ wide. Repair any holes in your foundation, siding, or roof that could allow them to enter. Install screens with small mesh on your chimney and any other openings that cannot be completely sealed off. Also be sure to eliminate gaps under doors that lead into your house.


Snakes

Snakes are misunderstood animals that serve as an important component of many types of ecosystems. All snakes are reptiles. Reptiles are ectothermic, which means they obtain body heat from their surroundings (also called cold-blooded). They bask in the sun to warm and seek shade to cool. They tend to be more active during the day in spring and fall, and more active early morning and evening during the heat of summer.

Snake physical characteristics:

Lack limbs

Covered in scales

Have no moveable eyelids

Elongated body with specialized scales on the belly (scutes)

No external ear openings, but can hear some sounds through vibrations of bones in the jaw

Snake behavioral characteristics:

Snakes flick their tongue in order to “taste” the air and ground. Particles picked up by the tongue are processed through an organ in the roof of their mouth called the Jacobson’s organ.

Air temperature is the main factor in snake activity. They control their body temperature by basking in the sun.

Snakes hibernate from late fall through early spring.

Reproduction

Snakes mate in the spring after they emerge from hibernation or in late-summer before returning to hibernation. Snakes can produce offspring in three ways:

Oviparous – egg laying. Young receive nutrients only from a yolk sac.

Viviparous – females gives birth to live young. Young receive nutrients solely, or in part, from the mother.

Ovoviviparous – females give birth to live young. Embryos receive nutrients only from a yolk sac.

In both viviparous and ovoviviparous species, the eggs lack a true shell. Instead, the young develop within a sac-like membrane inside the mother. Young of oviparous species have a leathery, flexible shell. Females will lay eggs in leaf litter, rotten logs and mulch piles, or underground.

Take Stock And Set Professional Engine Rebuilding

What Is the Average Lifespan of a Vehicle Engine?

When you purchase a previously owned vehicle, you have to take a number of different factors into account. Things like the accident history, prior parts replacement, the age of the car, mileage and the overall condition of the car are all elements that you will likely want to know more about before you make a final decision to buy a vehicle. One important consideration is the condition of the engine and how many miles are on the car. While engine longevity can range widely depending on the make, model, age and condition of the vehicle, there are certain factors and guidelines that you can keep in mind when trying to determine the lifespan of a vehicle’s engine.

Factors that contribute to engine longevity

There are a multitude of things that impact the longevity of the engine. In some cases, the area where you live might cause your engine to wear down more rapidly. If you live up a steep hill, for example, or if you have to pass over rough terrain on a regular basis, your engine will undergo more stress and will likely not last as long as it would if you were usually driving on flat, smooth roads.

The type of car that you have is also an important consideration. Generally speaking, heavy duty trucks won’t last as long as smaller cars do. Additionally, the amount of effort that you put into maintaining your car will greatly influence what you can expect to get out of it. If you perform all of your routine maintenance on time, take your car in to be serviced regularly and make any necessary engine repair


Top 5 Symptoms of Your Car Needing an Oil Change or Tune-up

There are so many different signs and symptoms that will show up and indicate your car needs an oil change and possibly a tune-up (see below for what a tune-up actually means).

When you take your vehicle in for an oil change, the service person will perform an oil and oil filter change as well as inspect your vehicle for leaks and other noticeable issues and then give you additional recommendations on what they think needs to be done.

However, you shouldn’t always depend on them to do this accurately because they might not always catch every issue. This is why you need to pay attention to the signs which indicate that you also need a tune-up of some sorts.

Below are the top 5 signs of your car needing an oil change and/or a tune-up.

#1 – Dark or Dirty Oil

If you’ve never seen clean, new motor oil before, it kind of has a bright amber color to it. But when oil becomes old and dirty from the build-up of residue particles in the engine, then it turns into a much darker, almost black color.

You should make it a habit checking the condition of your oil on a regular basis. Simply remove your oil dipstick and look at the color of the oil on it. Or wipe the end of the dipstick on a paper towel to get a more accurate result. If the oil is dark brown or black, then you need to change your oil.

#2 – Ticking or Tapping Noises

Engine oil gets old and worn after a while. That is why car manufacturers recommend you change your oil every 5,000 miles or so. If you have old oil in your vehicle, then it is likely getting dirtier and thicker.

This will make it harder for the oil to lubricate your engine’s components effectively. As a result, your engine will begin making various metal on metal noises because they are not getting lubricated properly. Get an oil change right away as serious engine damage can result if you ignore the issue.

#3 – Burnt Oil Smell

If the interior cabin of your vehicle is starting to smell like burnt oil, then you know you have some problem with your oil. It usually means there is an oil leak somewhere and causing the oil to drip on hot engine parts.

It also means your engine is likely low on oil and causing your engine to overheat. Take care of the oil leak right away and put in fresh oil.

#4 – Exhaust Smoke

If you live in a cold environment then you are used to seeing vapor emitting from the tailpipe of your vehicle. However, if you actually start seeing blue or gray smoke come out of your exhaust, then you probably have an oil leak.

This goes along with a burnt oil smell and the smoke is the result of not enough oil being in your engine to lubricate its parts, due to the leak. So, get that oil leak fixed and the oil replaced.

#5 – Car Stalling

If you’re driving and your vehicle begins to stall, then you could have a small problem or a bigger issue. A small problem would be if you have a clogged fuel filter or bad spark plugs. Something like this can be replaced with a simple tune-up. A larger problem would be something like a bad fuel pump or clogged catalytic converter which need replacing.


Signs your battery is about to die

Your car battery is responsible for powering your car’s computer, ignition system, lights, radio and more, so it’s important to monitor its condition to avoid getting caught out. A recent study showed that more than 1 in 10 car batteries need replacing.* Problems can happen almost without warning, however, there are a few key signs to look out for when checking if a car battery is dead.

  1. Difficulty starting the car

Your car requires a huge surge of energy to start the engine. With a failing battery, you’ll notice that the engine cranks more slowly than usual, and the car takes longer to start. You’ll often only get one or two warning signs of this nature before the battery completely dies, so don’t ignore it. If, when turning the key, you hear a clicking sound, there is not enough power to crank the engine at all. If this is the case you’ll need to jump start your battery and get a new battery fitted as soon as possible.

  1. Low/loss of power to electrics

Your car’s battery not only starts your engine – it also powers the various electronics inside your vehicle such as electric windows, lights, heaters and seats. A loss of electrical power is typically more noticeable in colder months, when these systems are running more than normal.

  1. Dashboard warning symbol

An illuminated battery symbol could be down to a loose starter terminal, a failing alternator or even damaged cabling. If the light stays on while driving, there’s likely a problem with your alternator belt (responsible for charging your battery while on the move). This shouldn’t be overlooked – a faulty charging system could leave you stranded.


Signs to tell if your spark plugs need to be replaced

VISUAL INSPECTION

Remove and compare your old spark plugs to a new one. If the tip and/or electrode show excessive wear they should be replaced. Also, look for fuel and oil contamination. If contamination is found, the spark plugs should be replaced. However, additional inspection is needed to determine the cause of the contamination whether it is caused by oil, fuel, or coolant. Failing components within the engine itself can cause oil or coolant contamination. Fuel contamination can be caused by failing components within the fuel, ignition and/or emission systems.

Pro Tip: The following are symptoms that may occur with worn spark plugs. Keep in mind, there may be other issues causing the problem. Be sure and do a complete inspection before replacing any parts.

TROUBLE STARTING

If you are experiencing what seems to be longer cranking times, especially on a cold morning, you’ll want to look at your spark plugs and related ignition and fuel system components. Over time, spark plugs develop residue from unburnt gases and oils, which reduces your car’s performance and makes cold-starting more difficult. Tough cold starting is not only bad for your engine, but can also drain the battery and increase starter wear and tear.

ROUGH IDLING

If your vehicle’s engine is running rough or noisy when idling, you may have a spark plug issue. Heavy rumbling when waiting at a stoplight or in a drive-thru may indicate your car is overdue for maintenance. Inspect the spark plugs and replace accordingly. Replacing the spark plugs, and potentially also the ignition coils and wires, may solve this.

MISFIRING

Misfires are hard to miss, as the engine will shake so badly that you’ll feel the vibration throughout the car. Misfiring results in poor performance, reduced fuel economy, increased emissions, and rough idling. Replacing spark plugs may help with this issue but inspect them first.

DECREASED FUEL MILEAGE

Low gas mileage is a subtler sign of worn spark plugs. Deteriorated spark plugs can account for as much as a 30-percent loss in fuel economy, which you’ll definitely feel at the pump and your wallet. If you’ve checked and determined the fuel mileage has dropped, check your spark plugs and related items for signs of wear.


How long will a car battery last?

Car batteries are designed to last between 3 and 5 years. All of our batteries come with a 3, 4 or 5 year guarantee, so in the unlikely case your battery fails, we’ll replace it for free.

How much does a new battery cost?

The cost of a new, fully fitted car battery depends on the type of car you drive. For example, a car that is start/ stop enabled will need a specific type of battery. Our prices start from just £49 (including fitting) and our technicians will always provide you with a quote upfront