Caring For Laminate Flooring

Benefits of Laminate Flooring

So you’re ready to update the look of a room with new floors. Or maybe you’re thinking bigger, and want to change your entire home! Or office. Or business?

We’re here to tell you – those all sound like great ideas! But at BuildDirect, we know comparing and contrasting different floors can be a pain. So, if you’re not sure where to start, here’s a bunch of benefits and reasons why laminate flooring might be the perfect solution for you.

Durability

Laminate is a strong, scratch-resistant, and highly durable flooring surface. Protected by a tough external layer and resin coating. It’s great for high traffic areas and houses where there are pets and children. For general residential and light commercial use, be sure to choose a laminate with an AC rating of 3 or higher.

Price

Laminate flooring is less expensive than traditional hardwood, but doesn’t fall short when it comes to look and quality. There’s a great laminate flooring choice for every price range.

Subfloors

Laminate’s versatile, and can be installed on nearly any type of subfloor, like concrete or even pre-existing vinyl floors. In many cases when the installation of a hardwood floor is not compatible with a subfloor, laminate flooring is a smart option.


Appearance of Laminate Flooring

One of the best benefits of laminate flooring is the variety of attractive styles. Laminate is made using a high-definition printer that creates almost any realistic design you can dream of. From hardwood designs to tile décor, laminate is available in a variety of colors and styles, not to mention a variety of textures.

Ease of Installation

Homeowners love laminate flooring because they can save hundreds of dollars on installation costs. With the tongue and groove locking systems, laminate flooring is designed for an easy floating installation that anyone can do – even people without a contractor license. Save money and hassle trying to arrange for professional installation.


Kid, Pet and Allergy Friendly

Kids and pets can be rough on floors. While no floor is completely safe from either, laminate flooring has a topical finish coat or wear layer that makes it resistant to scratching.

Laminate is also a favorite with homeowners who suffer from allergies. Dust and other indoor allergens such as pet dander can not penetrate the hard surface of laminate flooring the way it can cling to carpet fibers. Offering an affordable, attractive and allergy friendly alternative to hardwood floors is one of the many benefits of laminate flooring.


Maintenance and Repair

Laminate floors are easy to clean with a vacuum or broom. Mop with a slightly damp mop, or better yet, use laminate floor cleaner. No floor waxing is ever necessary for laminate floors. Avoid excessive water when mopping, which can seep into the seams between boards, causing swelling. Laminate flooring will not tolerate standing pools of water, which often appear in bathrooms, kitchens, and laundry rooms. For areas with heavy moisture, you need an impervious surface, such as vinyl or porcelain tile.

Laminate flooring has a wear layer that protects the photographic layer underneath and makes it somewhat resistant to scratches and dents, and very resistant to stains. Some manufacturers even issue very generous 10+ year warranties on the wear layer itself. If you do get a stain, it is usually easy to clean off.

The inability to sand and refinish is a major disadvantage of laminate flooring. If laminate flooring is heavily worn, deep scratched, or grooved, it cannot be sanded or refinished like solid hardwood—it must be replaced.


Cleaning Laminate Floors:

Do not use steam cleaners or wet mops, which may cause irreparable damage to your floor.

  • Use a damp cloth to blot up spills as soon as they happen. Never allow liquids to stand on your floor.
  • For tough spots, such as oil, paint, markers, lipstick, ink or tar, use acetone/nail polish remover on a clean white cloth. Then wipe the area with a damp cloth to remove any remaining residue.
  • Sweep, dust, or vacuum the floor regularly with the hard floor attachment (not the beater bar) to prevent accumulation of dirt and grit that can scratch or dull the floor finish.
  • Periodically clean the floor with cleaning products made specifically for laminate floor care.
  • Do not wash or wet mop the floor with soap, water, oil-soap detergent or any other liquid cleaning product. This could cause swelling, warping, delamination, and joint-line separation, and void the warranty.
  • Avoid using steel wool, abrasive cleaners, or strong ammoniated or chlorinated type cleaners.
  • Do not use any type of buffing or polishing machine on your laminate floors.
  • For spots such as candle wax or chewing gum, harden the spot with ice and then gently scrape with a plastic scraper, such as a credit card. Be careful not to scratch the flooring surface. Wipe clean with a damp cloth.
  • A more frequent dust-mopping or vacuuming schedule may be required in very sandy areas such as a beachside home.

Tips On Water Heaters Replacement

ASK THE EXPERT: WATER HEATERS

Savings from turning off water heater

Turning off your water heater when you don’t need it could help you save a few bucks each month if you have a tank-style heater that’s standard in many homes or even one of the newer hybrid, or heat pump, systems. That’s because even though water heaters are well insulated, a small amount of heat does escape the tank while hot water is waiting for you to use it. That energy loss is typically about 10 percent. So, for an average FPL customer which we estimate spends a little under $20 every month to heat water, about $2 of that cost is due to heat loss. That’s money that you could save by turning off your water heater when you’re not using it.

And, you may be wondering if you’ll end up using more energy to heat water that’s cool because you’ve turned off the heater. Not really. Think of it this way — you’re paying to heat the water anyway, regardless of whether you heat it right before you use it or heat it and let it sit until your next use. The small cost savings comes from avoiding the escaped heat while it’s waiting for you to use it.

If your water heater has an on/off disconnect switch, we recommend turning on the water heater a half hour before you need it, giving the unit time to heat your water. Then, you should shut it off again just before you start using hot water. Why? Well, if you wait until after a shower, for example, to turn off your water heater, it will start heating the new water that fills the tank, leaving you with another full tank of hot water and the escaped heat situation that you’re trying to avoid.

I imagine some of you might worry that you’d run out of hot water if you turned off your water heater before hopping in the shower. Keep in mind, your tank has a certain amount of hot water available at one time, and once it’s used, it takes time to reheat the tank as new water is added. So, essentially, you can run out of hot water regardless of whether you leave the water heater on during your shower or turn it off. Tankless water heaters are the only option that can supply hot water instantaneously.

What about timers?

Of course, you don’t need to turn off your water heater manually. You could always consider automating this step with a timer. This may save you some time, but possibly not the money you’re hoping for. You’ll need to weigh the cost of buying a timer and installing it against the estimated $2 monthly energy savings you could get from turning off your water heater manually.


WHY IS MY ELECTRIC WATER HEATER RAISING TEMP BY ITSELF?

THE WATER IN OUR ELECTRIC WATER HEATER GOT EXTREMELY HOT ON ITS OWN. ANY IDEAS WHY?

There are only a couple of things that will cause an electric hot water heater to raise its water temperature by itself. The first is a bad thermostat. A thermostat is designed to shut the temperature of the water off when it reaches the chosen temperature, but if the heat-sensing device goes bad, then the water temperature will continue to climb until the backup thermostat shuts off the power. Both thermostats need to be tested to see which one has failed. You will probably need a professional to pull it out and replace it. Unless you are very handy and know electrical safety, it is not recommended that you touch it. Electric water heaters typically have 240 volts going to the thermostat.

The other problem that could happen with an electric water heater is the tube surrounding the element, which separates the element from the water, may be damaged and the element may be heating the water directly. Generally you get hot water for a short period of time, then the element burns out. Sometimes you don’t notice that it’s gone because the other element continues to heat water. Every electric water heater has two elements, an upper element and a lower element. Both cycle to heat the water. An element is tested with an ohm meter; a small current is passed through the element to see if it is unbroken. If you get a reading from both poles of the element and it is within tolerance, then the element is still good. You have to test it with the power leads disconnected. Again, do not attempt this unless you know all of the safety procedures for 220 volts of power.

If the water heater is more than 10 years old, it is time to consider installing a new water heater. The time factor and parts for rebuilding the old water heater is the same as replacing it with a new one. You may be able to conserve more heat by installing a more energy-efficient model. Enough power may be conserved to eventually pay for the water heater. In addition, you may be able to easily convert to a tankless water heater that stores no hot water and is therefore even more energy efficient.


ARE TANKLESS WATER HEATERS GOOD?

Tankless water heaters , on demand water heaters and  instantaneous water heaters are different names for the same thing – domestic hot water systems that do not include the storage tank that comes with traditional water heaters.

The drawback with traditional domestic hot water systems:

Traditional domestic hot water systems use gas or electricity to heat water that is stored in a central water tank, ready for distribution.

The main drawbacks of traditional systems are the standby and transfer energy losses that result from the intermittent use of the water, the fact that water remains stored along tank walls and in pipes, and the design of the tank heat exchanger.

The more efficient storage tank water heaters would include features such as:

additional tank insulation for better heat retention and reduced loss of heat through the walls of the tank (or “standby loss”);

improved heat exchangers to transfer more heat from the energy source to the water;

factory-installed heat traps that allow water to flow into the tank but present unwanted flow of hot water out of the tank.

Some advantages of tankless water heaters:

Since tankless water heaters do not include a tank, they heat water only when a faucet is opened. In their most rudimentary form, tankless water heaters consist of an electrical element or gas burner, around which the water circulates towards its point of use. By reducing the thermal losses to the environment, (which are inherent in conventional storage tank systems), instant water heaters can offer energy savings.


THE BENEFITS OF A TANKLESS WATER HEATER

What’s one of the worst things that happens in the morning. You get up, someone else is already in the shower, so you wait your turn, and the water is cold. Maybe you’re the last person in the house to hop in every morning. Perhaps you need run the washing machine while you get ready for the day. Or, you just like a nice long bath and shower but end up out in the cold by the end of it.

Whatever the reason for your hot water woes, a tankless water heater may be just the thing to warm up your Rochester home. Not only do they to keep you in hot water longer — in the good way, that is — but they’re also energy-efficient and save money on your heating bill, too

If a tankless water heater sounds too good to be true … well, it’s not. There are quite a few things to think about when you’re deciding if one is right for you. However, with a little research and preparation, you can enjoy virtually unlimited hot water while saving money and being energy efficient.

How Do Tankless Water Heaters Work?

With a tankless water heater, cold water travels to a small heating unit that’s located on the hot water line close to the faucet, showerhead or inlet valve on a washer or dishwasher. Once the water reaches the heater, the unit turns on and brings the water up to the temperature you want. When you stop running the water, the unit turns back off automatically.

This is very different from traditional water heaters. With these, dozens of gallons of water sit in a large tank that’s constantly being heated so that they stay warm. If you use too much of that water at once, you start running cold water because there’s no more warm water in the tank.


Efficiency Water Heaters

Why go high-efficiency?

Upgrading to an efficient water heater will save you money over time (upwards of $3,000), but that’s not the only benefit. A heat pump water heater, for example, will perform similar to – or better than – a conventional electric model (more on that below) and come with a longer warranty. If a water heater can do all that while using significantly less energy, why not make the switch?

What is a heat pump water heater?

Heat pump water heaters work like a refrigerator in reverse: They capture heat from the surrounding air and transfer it to the storage tank to heat the water. Using existing heat makes heat pump water heaters up to three times more efficient than conventional electric water heaters, which must generate their own heat using an electric resistance element. Because water heaters can make up about 20% of your electricity costs, this efficiency is key to lowering your electricity bill.

Is it time to replace yours?

If your water heater is over 10 years old, you should start thinking about replacing it. Water heaters typically start failing when they are 10 to 15 years old, but waiting until it breaks can be costly: The average insurance claim for water damage due to a failed water heater is $4,000. And to make things worse, you may be stuck without hot water or end up with a flooded home

Fuel source

Water heaters can be powered in a number of ways; electricity and gas are the most common types, and propane, oil and solar models also exist. Heat pump water heaters are ideal replacements for electric water heaters, since they are powered by electricity but inexpensive to run thanks to their ultra-efficient technology.

Tank capacity and water heater size

Make sure your new water heater can handle your household’s hot water usage by considering the number of bedrooms and bathrooms in your house

There Is Something You Can Do To Get Over The Fear Of Wasps

How To Properly Remove Wasps From Your Property

How To Properly Remove Wasps From Your Property

The dog days of summer are here to stay, and you’re most likely enjoying them by spending time outside. But there is one flying friend you don’t want joining your barbecue: the wasp. Yellowjackets, paper wasps and hornets are common types of wasps that all seem to build their nests in places you don’t want them.

These insects are often seen as pests because of their painful stings, but they are important for the garden. After all, they’re predatory insects as well as pollinators. However, if their nests get a little too close for comfort or if you’re allergic to their stings, you probably don’t want them buzzing around you. With this in mind, we will discuss how to create an unwelcoming environment for wasps and how to eliminate their nets when necessary.

Deterring Wasps

Instead of removing the nest, you can always create an environment that the wasps will find unpleasant. Consider growing plants they dislike. These include eucalyptus, citronella, mint and wormwood. A bonus: these plants will also help deter mosquitos.

If planting isn’t your thing, try hanging a fake nest. Wasp colonies are incredibly territorial. When they believe another colony is already making a home in the area, they are likely to move on to another location. You can purchase a fake nest online, or you can create your own. To do this, fill a brown paper bag with crumpled-up newspaper and seal off the opening with tape. Next, crumble and shape the bag a bit to make it look like an actual wasp nest. Finally, hang it in an area where you don’t want wasps buzzing around.


Common types of wasps

Three types of wasps commonly seen in Vancouver are the European Paper Wasp, Yellow Jackets and Hornets.

The European Paper Wasp

The European Paper Wasp has long legs with a slender body that is about ¾ of an inch in length and narrows at the waist. The body of this wasp is black with yellow markings.

Yellowjackets

Yellowjackets are about the same size as bees. However, they do not carry pollen. Instead, they feast on meat. Yellowjackets can use their stingers repeatedly.

Hornets

Hornets are the largest of the three types of wasps. You can identify hornets by their black and white bald face. They too can sting repeatedly.

Reasons you may have wasps

Wasps will generally make their nests on the exterior of houses, in eaves, soffits and rain gutters. At times, they might make their way indoor. Wasps may be attracted to your home if you have lots of flowers and other plants. If you have food scraps left in your outdoor eating areas, spilled drinks that have evaporated to leave a sticky residue, and garbage bins that have not been properly covered, this is also an invitation for wasps. Insects and spiders are prey for wasps, so if you already have a problem with such pests, you might find that wasps are drawn to your home for that reason.


Wasp Removal Options

Most pest management professionals will offer homeowners the option of chemical-free wasp removal for foraging wasps that have become bothersome. The most common option used to naturally remove wasps is through the use of traps. Typically these contain a pesticide-free liquid that lures the wasp into the trap and are designed to make an escape improbable. Unlike homemade traps, professional traps are more successful because of their construction and placement. Made of high-quality materials with specially designed apertures, pest management professionals will strategically place these traps around your property where wasps habitually forage. These areas include outdoor bars, gardens, outside eating areas, near patios, and children’s play areas.

Organic Options For Wasp Removal

In addition to traps, pest management professionals may offer organic sprays as an option. Much like chemical pesticides, organic sprays are applied directly to wasp nests and work quickly to kill the wasps. Unlike chemical pesticides, however, organic sprays offer homeowners peace of mind in regards to the impact on their health, the soil, and overall environment.

Typically, the treated nest is left in its location after spraying. This ensures that returning wasps are also eradicated once they enter the nest. Additionally, wasps that return to find their home removed will typically build a new one. By leaving the treated wasp nests in place, the pest management professional is applying an effective control measure for the future.


DO’S AND DON’TS FOR WASP NEST REMOVAL AT YOUR PROPERTY

Do’s

  • Call the professional pest control service providers for this risky job. They have the right skill, proper equipment and vast experience that are highly required to execute such kind of tasks.
  • Choose the time of dusk or dawn to remove the nest because this is the time when the wasp nest is supposed to be less active and less risky.
  • Do your research part well enough before approaching the nest. Collect as much information as you can about the basic characteristics of the wasps to understand how do they react when you attack their habitat.
  • Be well-equipped with the right tools and wear the PPE or personal protective equipment to keep yourself safe from the attack of those angry insects.
  • Wait for a couple of days to be sure that all the wasps inside the nest are eliminated before destroying the nest to be on the safer side.

Don’ts

  • Do not approach the nest directly at the daytime. This is the time when the wasps are in their best active mode. They can be in their most aggressive form at that time which may be an extremely painful experience for you.
  • Never try to remove the wasp nest on your own if you find it very close to the windows or doors of your home. It will trigger the chance of having a wasp attack inside your home, and your loved ones can be in danger.
  • Never try to put the nest on fire. This will make the wasps terrified, and they will be in their best-attacking form to save their nest. Be gentle and follow the rules.
  • Do not go to attack the nest without any personal protection. If you cannot arrange PPE for yourself, try wearing full sleeves shirts and full pants. Wear a hat or cover your mouth and head with thick clothes. Keep the eyes open but try to wear glasses to protect them from the attack of the wasp’s strings.
  • Never ignore or take the matter of safety lightly while dealing with wasp nest on your own.


How To Deal With Wasp Nests On Your Property

If you have a wasp nest on your property, we don’t recommend trying to eliminate it on your own. Wasps have the capability to swarm you and sting repeatedly if they feel threatened, which they may if you start approaching their nest with a large bottle of pesticide. The best thing you can do is avoid the nest and call in the pest control professionals to take care of the nest for you. But there are a few things you can do in the meantime:

  • If dining outdoors, keep in mind that sweet food and drinks will attract hungry wasps. As summer wears on, the wasps will get hungrier and hungrier, especially as their colonies grow. Your food looks just as tasty to wasps as is it does to you, so it’s wise to keep it under wraps.
  • Trash cans can also attract hungry wasps. Keep a tight fitting lid on trash cans and don’t leave trash outdoors simply tied up in a plastic bag- this won’t be enough to keep wasps out of it.
  • Avoid wearing brightly colored clothes or floral scented perfumes or lotions when spending time outdoors. Bright colors and flowery scents can attract wasps in the same way that your food will.
  • If a wasp starts to buzz around you, don’t start slapping at it or act erratically. This can alarm the wasp and put it on the defense, which can cause it to sting you.
  • If you should get stung by a wasp, keep a close eye on it! Some people may not realize they have an allergy to the sting of stinging insects, so if there is unusual swelling, trouble breathing or what seems to be an allergic reaction, contact emergency medical assistance immediately!

Although wasps can be a problem on your property when they nest inside your home or threaten your family, these are actually quite beneficial insects. They are known for eating pest insects and have even been deployed by the agricultural industry into farms and orchards to eliminate pests that are eating the harvest. So although they can be helpful, they can also be problematic, as they were for the mother we recently helped with the son that’s allergic to wasp stings.

If you are dealing with a wasp problem on your property and you feel like they are starting to invade your space, please contact a pest control professional to help you get rid of these insects and their nest without causing problems for you or your family members.

Cinema Style Event Videographer

Video and production tips from hosting our first virtual event

COVID-19 (coronavirus) has made organizations all over the world rethink how they do business — whether it be sales conversations, internal meetings, or even planned in-person events

IMPACT had Digital Sales & Marketing World planned as an in-person event for April and when things quickly changed, so did our plans

Specifically we’re discussing:

What were the first few decisions you had to make to plan the virtual event?

What is the distinction between a webinar vs. a virtual event?

Why did IMPACT choose to go with pre-recorded sessions vs. live?

Did we see a difference between the pre-recorded sessions vs. live?

The tool we used for Digital Sales and Marketing Day, and what we looked for in a tool

What software did the team use for their pre-recorded sessions?

What were the good and bad parts of having people pre-record on their own at home?

What were the biggest takeaways from promoting the event?

How is IMPACT repurposing all of the video content from the event?


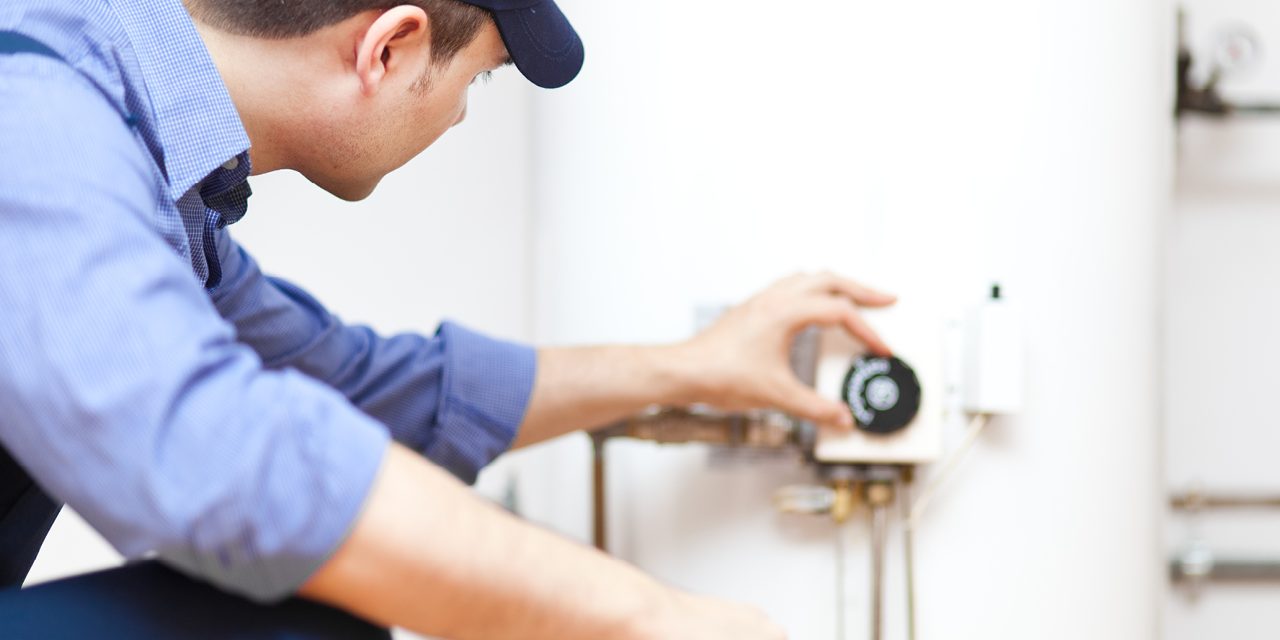
The Importance of Event Videography

The importance of event videography should be on everyone’s mind. Whether you are holding a huge corporate event or rare family gathering, get it recorded. Those events are special and something to be cherished and looked back upon in years to come. Let us help you record them!
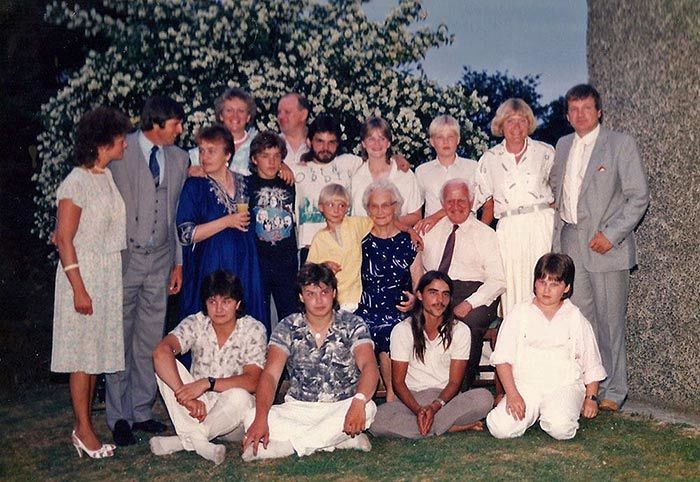
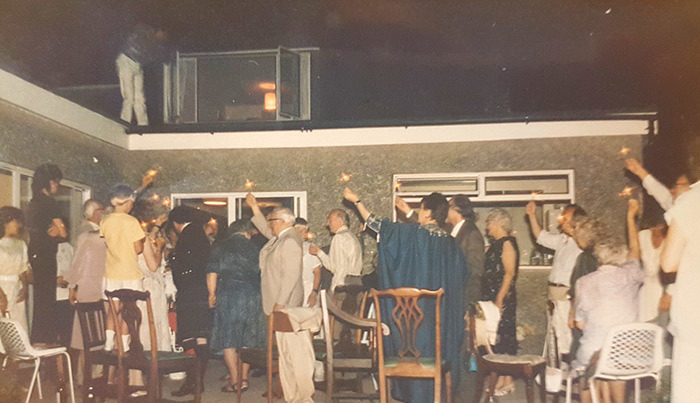
Event Videography

I had already been into photography for a number of years and had dabbled with video. Because this was a full on celebration day, I decided to film it on a VHS video tape recorder (no digital back then).

I made sure to capture everything and everyone and can still just about remember various sections of that tape:

Filming my grandfather in his lounge

Recording my cousins making Vodka and orange drinks

Standing on the roof of the house to record everyone outside

Filming my older cousin fast asleep at the end of the day

You see, I only have vague memories of that wonderful day because not long after, someone in my family who shall remain nameless, decided to record over the entire event with a western movie! It had gone forever…no back-up, no second copy, nothing! I was gutted to say the least.

What makes it worse is that not long after that day, we lost my grandmother and auntie and then about 10 years later, my granddad had passed too. I would give anything to see that video now.


The ROI of a Corporate Event Highlight Video

I get asked about this a lot by event planners so I wrote this article to answer two main questions:

What is a corporate event highlight video?

Why are corporate event highlight videos important?

A highlight video is 2-3 minute video that encapsulates the essence of your corporate event. It could be a town hall meeting, a trade show, conference or any event that matters to your company.

Lifecycle of a corporate event highlight video

The good thing about a highlight video is that you can use it as soon as the event wraps. A great strategy to maximize your investment for a highlight video is that you can use it 365 days of the year until the next event comes up.

END OF EVENT – you can use it as a feature presentation at your closing party or dinner.

NEXT DAY – use it in conjunction with your press releases, to thank sponsors and attendees, exhibitors, volunteers and vendors. Put the video up on your website and create social media content around it. If you are to send thank you cards for your sponsors, why not send it with this video on a usb stick.

WEEK 1 -2 – use it as an internal video to thank your staff for putting a rockstar of an event.

MONTH 1 – as the head event planner, use it to (or the raw footage) see what you missed at the event itself. We all know you were so busy running around that you missed the entire event. Use it to assess the success and weaknesses of your event from a planners point of view.

MONTH 3 – Sometimes, at this stage – researching and inviting new sponsors is already in the works. Why not leverage this video to help you sell the event for next year by pointing highlights of this year’s event (via the video) that may benefit them.

MONTH 4 – Email invite to prospect attendees. By this time the attendees have had time to digest what they learned from your event, why not give them a little nudge to save the date for next year with this video as a great reminder for the fantastic time they had at the event.

MONTH 5 – As a head event planner, it’s time to share the raw footage of this video with your team to assess what needs to be maintained or changed for the next event. It is a great visual tool to remind your staff or people involved of what has transpired. With the looming event coming up, the chances that they will be addressed during this planning stage is the best way to produce a very polished event.

MONTH 6 – Half way through the year. It’s time to review who has come on board as your sponsor or vendor for the upcoming event. Need a little push to find fresh prospects? You guessed it, this video will be able to help you get the conversation started.

MONTH 7 – Is it time to publish your newsletter to your existing attendees? Why not put this video on that newsletter again with a call to action to the EARLY BIRDS.

MONTH 8 – Time to launch the event website once again. Consider re-editing the video which will give people something new to look at. Show them something else they haven’t seen before, make it shareable on social media – make this easy.

MONTH 9, 10, 11 – Splice up the video into small soundbites that will help you created engaging content for the next 3 months. Repurposing the video and repurposing the raw footage will give you longevity. Remember to always lead the call to action into the sales page. Why not inject new information about the event as well with graphic slates.

MONTH 12 – One last hoorah to get people more excited about your event, “last minute deals” “don’t miss out”


Q & A Answers to commonly asked questions from the experts on Thumbtack.

How do you choose a wedding videographer?

A wedding videographer will create a lifetime memory for you from edited video footage of your wedding day, ceremony and reception. Choosing a wedding videographer starts with looking online at portfolios of their past work. There’s no need to talk to anyone unless you love what you see. Next, make sure they have good reviews and past client experience; don’t be shy about asking for references if there aren’t any posted online. When you find someone who has a style you love, ask if they are available on your wedding day. If so, it’s time to talk pricing. Be clear about your maximum budget, and ask what kind of packages they offer. Pricing will depend on the number of crew needed for filming, the hours they are required to be onsite, post-production editing, and the length of the final product. Talk with several wedding videographers to get a feel for what prices are like in your region. Nationally, the average cost for wedding videography ranges between $990 and $1,260 per event. Once you agree on a product and have a plan, get everything in a written and signed contract. Clearly state the details of what is expected for your wedding day and from the final product. Be prepared to pay a deposit to reserve their services for the day, then pay the remainder upon receiving the video.

What is a videographer and what do they do?

A videographer professionally films weddings and other events and edits the footage to create film keepsakes or marketing materials for their clients. Wedding videographers record all the key elements of your wedding day, ceremony and reception, and then edit the hours of film during post-production to make a wedding video, social media highlight reels, and any other film features you choose. Wedding videography captures, in live action, your vows, the cake-cutting, the first dance, reception toasts, the decor, the guests and all the details of your day. Many wedding videographers also interview guests (based on an interview list provided by the couple) and incorporate the recorded responses into the wedding video. Event videography typically costs less than wedding videography, as events are shorter with less detail. The national average cost for event videography is $500-$760, while the national average cost for wedding videography is $990-$1,260. A videographer usually does not need to be licensed, but it is important to confirm they have insurance and good standing in the business community, as well as good client reviews. A great majority of the work happens during post-production. The pros watch and blend together the hours of footage they took (sometimes from multiple cameras) to capture the story of your wedding day or event.

When do you pay your wedding videographer and wedding photographer?

Most wedding videographers and photographers require a set deposit when you hire them. Wedding season is a busy time and a deposit secures that vendor’s services for your wedding date. It also protects the vendor if the couple changes their mind at the last minute, and they can’t find a new booking and lose work for the day. The deposit may be anywhere from 20 percent to  50 percent of the agreed-upon total price. Always get a written confirmation that your deposit has been received.

What should you ask your wedding videographer before hiring?

Finding the perfect wedding videographer doesn’t have to be stressful. Asking a few key questions upfront will help you find the right fit for your big day. Before talking with wedding videographers, research their work online. Look at their websites, business profiles and social media, and see what their finished wedding videos look like. If the style fits what you’re envisioning, it’s time to reach out. During initial contact, make sure you get along with the person. This is important since they’ll be interacting with you and your guests.

How much is videography for a wedding?

Wedding videography is one thing many couples regret not paying for. It may seem like just another expense during wedding planning, but it’s really special to have a moving memory of your big day. The national average cost for wedding videography is $990-$1,260. Pricing can vary depending on wedding length, special film features, the amount of editing required, and how many videographers are needed to cover the event. Many videographers offer packages that provide different levels of service. A very simple wedding documentary could be $600 or more, while a full-scale cinematic experience involving multiple videographers could be $2,500 or more.


Videographer Resume Examples

Videographers record and edit moving images; their services are required for TV productions, filmmaking, documentaries, and various events. Common duties listed on a Videographer resume example are discussing requirements with clients, filming videos, directing camera studio equipment, editing video digitally, and making content tweaks. Based on our sample resumes, key qualifications for this role are videography equipment proficiency, creativity, attention to details, multitasking, physical endurance, dexterity, and good communication skills. Formal education is not mandatory, although many candidates for this job hold a certificate in videography.

Produced videos of surgical procedures for educational purposes for the residency programs and for national publications.

Prepared with outside producer and/or independently, sponsors video for fundraising events for area hospitals to help achieve their campaign goal of $5 million.

Created conversions and determined best setting for videos for the web-based learning in area health area system.

Designed PowerPoint presentation for numerous medical groups for physician education. These presentation are utilizes at national medical conferences giving the presentation some constancy in their branding.

Investigated how to achieve high quality video and graphics from PowerPoint, creating excellent quality video in less time for use in fundraising campaigns.

Created and designed video for Milwaukee Art Museum Brook Stevens exhibit to be shown in the museum to educate the public on what Brooks Stevens developed.

Produced 10 video productions for Lakefront Festival of Arts over the course of 15 years to thank the volunteers for their efforts.

Volunteered to produce the video for [company name] Team Phoenix project to train and educate breast cancer survivors to participate in a triathlon and healthy lifestyle.

Coordinated interviews with couples/families and executed planning for event(s).

Researched target markets for service.

Implemented creative and unique shots for special events/occasions.

Brought in client base, negotiated prices, filmed events, edited videos and delivered an exceptional product to clients.

Implemented public relations, social media and marketing for the company: business cards, website, Vimeo account, social media sites and brochure packets to reach clients.

Created same-day edits.

Provided online based music/entertainment coverage through the photography and videography, of concerts and industry events

Conducted extensive research to compile biographical content and current information in preparation for interviews

Recorded, edited, and posted interviews and videos for public consumption on [company name]

Implemented creative control in the overall interviewing style and process

Managing all exclusive video content for site and youtube page.

Created videos, full length DVDs and promos for various clients in the NYC area

Brought clients’ video requests to life from the concept stage through to the final finished product

Aided professional clients in creating videos from seminars and corporate workshops

Created fun and exciting full length DVDs of concerts and promotional videos for local rock bands

Wrote, directed, shot and edited all videos in a timely manner while also meeting all creative requests

How To Choose A Custom Home Builder

Why is Custom Home Building Different from Other Types of Residential Constructions?

Building a custom home is not like building any standard residence. It is a special project which requires special skills. This is not something that every other builder can handle and before you employ someone’s services to start on this undertaking, you should get all the details crystal clear.

The vetting process for the perfect builder for your home should begin right from the point when you go to meet the first candidate. You need to do your level best to understand their experience, creativity, licensure and whether they will be able to give you your dream home at a reasonable price. We understand that gauging all of this can be hard at first. That is why we have come up with a list of things you can ask your would-be builder to ensure they can give you the residence you desire:

1. License and Insurance

This is the first thing you should ask your potential builder. Do not assume that because they have a license to build in some other area, they will have the permission to build in yours. Clarify this point right at the beginning. Also, ask them if they are insured. Most will be but you also need to find out what aspects of the building process are covered by the insurance.

You should also ask about the insurance of the subcontractors the builder will use to construct your home. Once you have established that the builder is legally permitted to undertake construction in your area and has the correct insurance to accommodate any eventualities, you can proceed to the next question.

2. Duration of Working Experience

This is a very important factor to consider when selecting the right builder for your custom home. Most builders have a specific area that they focus their services in and if you can find one who has ample experience in building, then region then there are several benefits you can enjoy.

First, they will know what the popular trends and customization features are popular in the market. Second, they will know what kind of soil is prevalent in the region and will make the construction plan accordingly. Third, they will know if the area is prone to any natural disasters like earthquakes, floods, cyclones etc. and will make amends in your basic plan to prepare for these. Once you find a well-experienced builder, you can move the planning to the next phase.

3. Previous Work

Ask the builder if they can show you a custom home they have previously constructed. Most good custom home builders will be able to do that. When they take you to the home, check the quality of work, finishing and any specialties that they might have worked on for this custom home that you may want for your own. You can also talk to the owners of the home and ask them how their experience was. This is sure to give you a clearer understanding of how your builder works. After you have fully satisfied yourself with the portfolio and reputation of the builder, it is time to talk budget.

4. Cost of Construction

The cost of building a custom home will naturally different with every project. Also, you have to consider that you will want to change something or the other while the project is underway. So, it is best to leave some space open for impromptu customizations and decide on a reasonably flexible budget.

Now, ask the custom builder if they can accommodate all your requirements within that budget. Don’t go for the lowest quote in thinking you’ll save a few extra bucks because you will end up losing a lot more than you would expect. At the same time, don’t go for the priciest one either. Thinking that you will get the best of everything if you just spend enough is misguided. Pick one that falls just right in between your margins.

5. Warranties

Most trustworthy and reputable custom builders will give you at least 1 year’s warranty but can give you as many as 10 years as well, at least structurally. Also, ask them what is covered under the warranty. Get this answer in writing from them on the contract to ensure future safety. If you keep this in mind, then even if there is a problem with the house later on, you will not have to spend a dime to fix it.

6. Method of Working

This is regarding how often the primary custom builder is involved with the project. Ideally, they should come and oversee some of the work every day. But, you should know that most custom builder, especially the good ones, will not be able to give your project that much time as they probably have projects going on elsewhere. So, you should negotiate with them and decide upon a fixed routine to follow for the entire duration of the build. Something like 4-5 visits per week is good.

Also, make sure that they give you regular, preferably weekly updates and that they would be available on phone or through mail if you even need to reach them.

Trustworthy and Service-oriented

The homeowner/homebuilder relationship is (or should be) a close one. You’re collaborators on a very personal project, and the builder you choose should show genuine commitment and desire to be your trusted advocate through the entire journey. They need to care about your home as if they were building it for their family, and they need to handle your resources with as much respect and responsibility as if they were their own. How do you know when you’ve found a builder like this? Above all, they will take the time to ask questions. They will listen to what’s important to you, and then adopt those priorities. The only agenda that should be on that construction site is yours: your builder should be acting as your proxy at all times. If you can really trust your homebuilder, you are safe from ending up as another construction cautionary tale.

The Super-Important Details You Need To Consider During the Custom Home Building Process

– Create a solid design. What is the function of this home? Is it a summer getaway that you may sell one day? Or, is it a home that you will grow old in. Plan for the present and the future.

– Make sure your lifestyle can handle the process of building a new home. Building a house can take a while. so make sure your family and your pocketbook are stable.

– Come up with a system to organize and keep track of everything. Staying organized will save your sanity.

– Does every room have a purpose? Don’t just build a room to have it there. Make sure to optimize the space in your new home.

– Find a team that you feel comfortable with. Don’t your dreams of building your own house into the hands of someone you don’t trust. Sit down with the people who will be working with you and get to know them.

– Inspect the ground you want to build on and the rules that come with it. There are laws and codes that your house will have to meet. The faster you understand those requirements, the better.

– Do your homework and prepare to spend your money. Building a house isn’t cheap, but it is worth it. Don’t be caught off-guard by a surprise expense. The more you know about the home building process, the better off you will be.

– Keep around 10% of your budget for unexpected expenses.

– Don’t forget about landscaping. Building your house is the main project. But have an idea of what you would like the entire lot to look like.

– Create a list of what you want and how bad you want it. Is granite a must-have that your are going to splurge on? Decide this now to help you sort things out later.

Know what you are getting into.  

I don’t want to scare you if you’ve decided to build.  In fact, for the most part I really enjoyed our building process.  That being said, there are a lot of things you need to consider before you take on building a house.  The first one being the massive time commitment building is.  If you are building a custom home like we did it is easily at least a part time job (some weeks full time!).  We knew it would be time consuming, but had no idea just how time consuming.  The early stages of designing the home weren’t quite as busy, but once the house was framed and construction was moving, it got crazy quickly.  If you are in a situation where you are already overwhelmed with work and kids and life commitments, it might not be the best time to build.  You’ll want to spend a lot of time at the house making sure things are getting done correctly so factor that into your decision.

This was the most difficult part for us!  Which leads me to my next warning.  Building is hard on a marriage.  Money flies when you are building so there is financial stress.  If you are like most people you’ve worked incredibly hard and saved money for years to be able to build a home (15 years for us!).  Stressing about finances always causes strain on a marriage and costs always end up being higher than you think they will be when you build.  It can also be stressful when you don’t agree on design decisions.  That wasn’t an issue for us because my husband didn’t care what the house looked like so I had free reign on all things design, but if you both care and have strong opinions that will be a challenge.  For us the most difficult part was that we were both just so overwhelmed and exhausted from how much work it was that we sometimes took it out on each other.  

Months after we moved in and things had settled down I remember my husband and I joking about how we had decided we liked each other again. 😉  Like I said before, I’m not telling you these things to scare you.  I just think knowing what you are getting into and possibly talking to your significant other about how you will deal with these issues when they come up is a good thing!

Building and Constructing Your Custom Home

After you approve your custom design, it’s time to start building your home! Well, not really… 

During this transition phase from design to build, your builder typically will handle the homeowner’s submission and permitting. We do this to ensure that nothing delays your build such as issues with the city. This phase is much easier on your end, but there are a few considerations you must be aware of: 

  • Too many change orders could delay your build. Almost always, you’re going to want to make changes to your home’s design after approval and well into the construction phase; it’s perfectly normal! However, if you’re having too much trouble making final selections in this phase, it might delay the construction. 
  • Excellent communication with your builder avoids headaches. “Lost in translation” is a famous saying (and a critically acclaimed film) for a reason. Sometimes, there is a disconnect between construction and design. Moreover, there might be a disconnect between you, the homebuyer, and the designer, which then the project manager has to relay, which then affects the general contractor. You start to see how things can get jumbled fairly quickly. That’s why having direct, open-line communication and liking your builder’s communication style are critical to avoiding headaches (if any) down the road. 
  • Will your new home be energy efficient? Besides being more environmentally friendly, LEED-certified homes can save you some serious bucks. If you’re interested in building green, it’s important to find a builder who builds green. These buildings, which use specific building materials, offer a multitude of benefits, including:
    • Better air quality for your family (fewer allergens)
    • Better return on investment (higher resale value)
    • Better water efficiency (lower water bill)
    • Better energy efficiency (lower electric bill)

Professional Moving Services – The Benefits of Hiring Trusted Movers

Moving is quite an important process. However, to ensure a successful move, it is important to plan for it and hire professional moving companies. A good plan allows you to determine what is being moved and how it will be moved. You will need to determine how the family pet(s) will be moved too. The moving company will not be throwing one item in a box. Before the moving day, make sure to visit your vet in order to obtain current shots, certifications, tags and proper identification. Pets that will be travelling over a long distance by car or air require travel recommendation, motion sickness medication and portable kennels. Remember that animals papers will be required if you will be moving across state lines.

Using a Moving Company

If you have a family, you will most likely go for this option. Or you might simply have so many belongings that doing it yourself is out of the question. Using a professional interstate moving companies is also guaranteed to be more expensive, and you will have to pick a date and time for the moving to take place.

However, using a moving company also comes with many advantages. Your property will be moved by professionals, who know how to handle everything with care. Your belongings are insured by the mover in case of any mishaps. And lastly, you can get a fixed price. There are websites dedicated to obtaining price quotes for you, but be aware that the prices are not guaranteed. Nevertheless, they can give you an impression of what you should expect to pay.

One week prior to actual move day

Complete the process of packing up your belongings. Make any arrangements necessary for your new abode, such as hiring a professional cleaning company to care for the space. Keep the lines of communication open with your Realtor and moving company. Diligently reconfirm everything on your list as extensively as you need to feel comfortable.

Moving can be stressful, but partnering with the right real estate firm can remove many stress points from the process. You are about to embark on a new chapter in your life with all the fun of making your new house into a home.


Homebuyers Visual Home Electrical Safety Inspection Reports

ELECTRICAL SAFETY TIPS FOR OLDER HOMES

Electricity has become such a standard part of our daily lives that it is often taken for granted, but electrical failures are a leading cause of home fires every year. Homes with aging electrical systems are at increased risk for electrical fires. It’s important to note that all electrical work in your home should be performed by a licensed electrician in accordance with local and national codes. Follow these safety tips to identify and prevent electrical hazards.

Reasons to Get an Electrical Inspection

Your home is 40 years old or older

You purchase a previously owned home

Your home has undergone a major renovation

You have added major new appliances in the last 10 years

Warning Signs

Frequent problems with blowing fuses or tripping circuit breakers;

A tingling feeling or slight shock when you touch an appliance

Outlets and/or switches that are warm or make crackling, sizzling, or buzzing noises

Flickering or dimming lights.

Circuit Breakers and Outlets

Consider having your circuit breakers replaced with arc fault circuit interrupters (AFCIs), which provide enhanced electrical fire protection by detecting dangerous arcing conditions.

Make sure all electrical panel circuits are properly labeled. Always replace fuses or circuit breakers with the correct size and amperage.

Use ground fault circuit interrupter (GFCI)-protected outlets in areas where electricity is near a water source, like in the kitchen and bathroom.

Every month use the TEST buttons to check that GFCIs, AFCIs, and smoke alarms are working properly.

Routinely check cords, outlets, switches, and appliances for signs of damage. Do not use damaged electrical devices.

Do not overload outlets with too many devices or appliances.

Cords, Plugs, and Lights

Do not use extension cords on a permanent basis, and never use them with major appliances.

Never run electrical cords under rugs or carpets.

Do not pinch cords under furniture or in windows/doors.

Always use light bulbs that match the recommended wattage on the lamp or fixture

ELECTRICAL INSPECTION

Anytime Electric will thoroughly inspect the electrical of your home or office to ensure that it is up to St. Louis electrical code compliance and to make sure it is safe to inhabit. Electrical inspection is must if you are buying or selling your home.

we want you to feel safe and trust the electrical in your home or office. Last thing you would want is an electrical fire or for the electrical to damage any electrical devices or appliances

Electrical Inspection Provides the Following Services

Electric Inspections

Electrical Repair

Electrical Troubleshooting

Electrical Safety Inspection

Home Electrical Inspection

Residential Electrical Inspection

House Electrical Wiring

Electrical Code Inspection

Home Wiring Troubleshooting

Wiring Inspection

Wiring Testing

Electrical Systems

ELECTRICAL SAFETY TIPS TO HELP PREVENT ELECTRICAL FIRES

Have all electrical work done by a qualified electrician.

Qualified electricians are trained to install all electrical outlets and wiring to meet building codes and standards. They will make sure all fixtures are installed properly, and a qualified electrician will be able to see a faulty outlet from a mile away.

When you are buying or remodeling a home, have it inspected by a qualified electrician.

Once again, a qualified electrician will be able to properly inspect all electrical outlets, installations, and fixtures. It is better to have your home inspected by a professional than by a third-party with a limited electrical installation education.

Only plug one heat-producing appliance into a receptacle outlet at a time.

Heat-producing appliances include coffee makers, toasters, space heaters, or any other appliances that produces heat. Reduce fire hazards by only plugging in one of these appliances into the outlet at a time, and be sure to unplug the appliance after use.

Major appliances should be plugged directly into a wall receptacle outlet.

Major appliances could be refrigerators, dryers, washers, stoves, or air conditioners. Extension cords and plug strips should not be used because they are not meant to carry the large loads of these major appliances. If needed, avoid a fire hazard by having a qualified electrician install wall receptacle outlets closer to your major appliances.

Use Arc fault circuit interrupters (AFCIs) that are designed to shut off electricity when a dangerous condition occurs.

Arc faults are unintended arcs created by a current flowing through an unplanned path. The arcs create high intensity heat that result in burning particles which could easily ignite any surrounding material, such as wood framing or insulation. Having an AFCI will definitely help prevent a house fire at the hand of an arc fault

Electrical safety tips every homeowner should know

Electricity is something we don’t think about much. In fact, we take  for granted that it is there for us when we need it. Most importantly, we rarely consider the “dark side” of electricity. If not respected, electricity can injure you severely, or even kill you.   Let’s take a look at ways we can keep our relationship with electricity safe and productive.

The best way to protect children from electrical injuries is by preventing them from being able to insert anything into outlets. There are several ways to do this, from little plastic plug caps to complete outlet covers.

However, the best way to keep little ones (and everyone else) safe is to install tamper resistant receptacles (TRRs). They look like normal receptacles, but they are equipped with spring-loaded shutters that block the slots and prevent objects from being inserted. When a real plug is inserted, the springs are released and the plug slides in smoothly. The trick is that an electrical plug compresses both springs at once. However, if a child inserts an object into one opening, the springs do their job and the object does not make contact with electricity.

Are TRRs expensive? Not at all! They cost just a bit more than regular plugs. This one’s a no-brainer! Replace all your outlets with TRRs. If you’re not comfortable doing it yourself, call a licensed electrician. It’s a small price to pay for the safety of your little ones. Click here to watch a video about how TRRs work.

Keeping Cool!

Electrical outlets and switches should be cool to the touch and tight. If they feel warm or loose, emit a burning smell, or make a crackling noise, go to your electrical panel and shut power to that breaker immediately. Replace the switch or outlet before a fire or injury happens.

Home Electrical Safety Tips

Homeowners always strive to keep their family and property safe from accidents. With so many different systems and appliances to consider, there are many things to be mindful of when securing your home. Electricity is one of those things. Check out some of our tips own electrical safety tips to keep your home and family safe!

Don’t Overload Outlets

Plugging too many items into outlets is the cause of many house fires. Outlets are designed to handle a certain amount of current. Power strips or extension cords are often used to allow several different electrical items to pull power from one outlet. If the outlet is overloaded, it can cause issues with the breaker box. In the worst cases, outlets can spark and start a fire. Keeping outlet load at a reasonable level is one of the electrical safety tips that can save lives.

Water and Electricity Don’t Mix

One of the primary electrical safety tips that everyone should know is that water will conduct electricity. Many unsuspecting people have been shocked by touching their appliances with wet hands, or when using electronic items too close to water. Having an outlet by the kitchen sink additionally increases this risk, so be careful.

Ground Fault Circuit Interrupters (GFCI)

GFCI outlets are the safest and most recommended electrical outlets for any room that has running water. They’re also great when you want to make the room child-proof. If an outlet gets wet, has a foreign object inserted into it or if it is overloaded, a GFCI will cleverly detect the power surge and disable the outlet.

Electrical Cord Safety

Be mindful of both the power cords on appliances as well as of any extension cords. Here are a few things to consider when dealing with cables.

Electrical Installation And Earthing

Best Electrical Installation & Replacement Price

What are Some of the Electrical Installation Services Love Plumbing, Air, & Electrical Provide?

Even when it all seems to be fine with your home’s electrical systems, problems can be present that could put you and your home’s safety at risk. Good news, Love Plumbing, Air, & Electrical knows what to look for & the solution to the problem.

If you notice any of the following, an electrical problem may be present then it’s time to call the professionals at Love Plumbing, Air, & Electrical for an electrical instillation:

Light Switches Not Working Properly?

Is your light switch not turning on or flickering when it does? Your South Carolina homes’ light switch issue may be stemming from an outlet, circit, or wiring problem.

Are Your Lights Too Bright or Dim?

If some lights around the house seem excessively bright or dim, there are two common causes. Different types of lights with different wattage levels can be an issue. But typically the problem stems from a bad or broken main neutral connection. This problem requires professional electrical replacement, so give Love Plumbing, Air, & Electrical a call before it’s too late.

Electical Lights & Appliance Systems in SC are Prone to Excess Electrical Usage & High Energy

If your house is over 5 years old there’s a possibility that you’re not using the most up-to-date and energy efficient lights, switches, and appliances. This could cause frequent circuit overloads & cost you extra $$$ every month.

Different Home Wiring Types Explained

An electrician apprenticeship starts as little as 100 hours in a trade school lab, all the way up to universities offering 4 year degrees. That’s how much training and knowledge goes into becoming a licensed electrician. But understanding the basics of your home electrical wiring doesn’t have to be so intensive.

If you’re doing a simple DIY project around the house, you should know about the types of electrical wire in a home. There are also common coding, sizing, and labeling you’ll need to understand.

Why You Need to Know About Your Home’s Electrical Wiring

If you’re doing any type of project around the house, understanding your home electrical wire can make the job easier.

You need to know about the types of electrical wire when you’re:

installing new wiring and need to know what type of wire to use

looking for electrical problems in your home (i.e. knowing the circuit that wiring belongs to can help you determine the cause of an issue)

doing any electrical repairs or remodeling

The Basics of Home Electrical Wire

Before we dive into the types of electrical wire, there are some basic terms, labeling, and coding you should know about. Understanding these can make your trip to the hardware store that much easier.

Planning makes all the difference

Whether it is a brand new building or a refurbishment, it‘s important to plan the electrical installations to the individual habits and requirements of the respective occupants. Asking some simple questions at the beginning avoids any overloading of circuits with multiple high-performance electrical appliances, or an increased use of connector strips.

Things to think about

Here are a few things to think about to allow architects, builders or electrical contractors to plan and implement the correct electrical infrastructure:

In which room do I use which electrical appliances?

Where should light sources be installed (both fixed and via sockets)?

Where are the TV, computer or telephone connections required?

Where should switches or control modules be installed for Smart Home functionalities?

Where are mobile devices usually charged and should special sockets with USB ports be installed?

How do I want to control the outdoor lighting?

You can then decide:

The number of circuits

The number of sockets

The number of lamp connections

The number of TV and communication connections

Preparation of electrical installations for Smart Home functions, such as multi-room audio systems, electric roller shutter control, alarm system

The planning is carried out on the basis of a construction plan or floor plan of the house or apartment that is as accurate as possible – either in the original or on the computer with corresponding group plan software.

Pay particular attention to doors and their opening direction, windows and stairs, and steps and fireplaces.

Planning your kitchen

The first room that is planned is usually the kitchen, due to the long delivery times for many of its features. For example with an open plan kitchen adjacent to the living room, place very specific requirements on lighting planning, and connections for ovens, microwave, extractor fans or freezer and refrigerator. Electrical planning is often carried out in a dimensioned plan when ordering a new kitchen, in order to ensure the correct implementation.

WHY IS COPPER USED SO MUCH IN MAKING ELECTRICAL WIRES?

Copper is a well-known chemical element with atomic symbol Cu and atomic number 29. It has a beautiful red-orange metallic luster. In the modern days, this reddish metal is used in various areas like in the construction line as a building material, in roofing and plumbing, in industries as a raw material, as a constituent of various metal alloys, and most importantly in the electrical industry for making electrical copper wires that run through your New Haven home

Excellent Conductor of Electricity: Copper is an excellent conductor of electricity; no other metal can compete with it in terms of electrical conductivity. The wires made of this reddish metal are capable of carrying comparatively more electric current per diameter of wire. In other words, these wires deplete less electrical charge in comparison to other wires when electric current passes through them.

Very Ductile Metal: Copper is a very ductile metal, which means that it could be stretched to a good length without breaking or weakening it. This property is crucial from the point of view of drawing wires out of any metal. The reddish metal stands well on this parameter

Favorable Chemical Properties: The chemical properties of this metal go a great deal in making it an ideal element for making electrical wires. Copper’s favorable chemical properties make it resistant to abrasion and other bad effects that shorten the life of a wire. These wires can safely withstand adverse climatic conditions and thus last longer.

High Temperature Tolerance: As we know that electrical wires take current from one place to another. In such a situation, when high voltage current passes through a wire its surface temperature becomes high. There is constant rise and fall in the temperature of high-tension electric lines. Not every wire could sustain such fluctuation in temperature, but copper wire can. This special property makes these wires long-lasting.

Get Electrical Installation

Does your home or commercial building need electrical installation? Whether you need an electrical panel, a switch, an outlet, or an entire electrical system. You should not choose just any residential electrician to work on this important part of your home or building. A faulty electrical installation or problems with the wiring can cause serious harm.

The Importance of Picking the Right Electrical Installation Service

Installing electrical components can be difficult and even dangerous if not done correctly. We are one of the top electrical installation companies in the area. With over two decades of experience, you can count on us to get the job done right. We know how to offer the best electrical installation service. When you choose to work with our company, you can have confidence knowing your installation will last for many years to come.

If you have any issues, we will be more than happy to help you. We offer free estimates for our customers so you can gain a better idea of what the electrical installation service at your home or building will involve. Whether you need a circuit installed at your home or an electrical system redo at your commercial facility, we can help you. Don’t try to do this job on your own – it can be more dangerous than not doing anything at all.

What Is the Electrical Installation Cost?

When you choose to work with Dynamic Electrical Service, you will find the electrical installation cost is well worthwhile. Working with reputable, licensed and insured electrical contractors such as us will ensure that your home or building remains safe from potential electrical issues. We will efficiently and safely install everything you need so you can spend your time on something else.

Window Cleaning Poles

Choosing the Right Replacement Windows for Your Home

Contrary to what some ads say, saving money on your energy bills is not the reason to replace your windows. That’s because it could take decades to recoup the $8,000 to $24,000 you’ll spend on new windows and installation. Energy Star-qualified windows can lower your energy bills by 7 to 15 percent. That’s only about $27 to $111 per year for a 2,000-square-foot, single-story home with storm or double-pane windows, or $126 to $465 if that home has just single-pane windows. So why bother?

New windows can make your home quieter, more attractive, and less drafty, and they don’t need painting. They’re also easier to clean than old windows with combination storm and screens and can reduce your carbon footprint.

Price doesn’t indicate performance

Among double-hung clad wood windows, a pricey and bottom-rated window from Andersen, $500, wasn’t good at keeping out cold air and was so-so at keeping out rain. A $450 Kolbe vinyl double-hung was impressive, but a top-rated $260 Simonton was even better. All of the casement windows aced all tests. Prices varied by frame material; the top-scoring American Craftsman vinyl window, $260, is the least expensive casement. All prices are for a 3×5-foot window.

Match windows to climate

Look at the overall scores in our window Ratings, then zero in on test results that apply to where you live. If your home is exposed to high winds and cold temperatures, look for windows that were excellent at low-temperature wind resistance.

Don’t overspend on options

Upgrades can easily add 50 percent or more to the base cost of a window. Focus on features that add value. Low-E coatings improve efficiency, but triple glazing probably isn’t necessary unless you live in an extremely cold climate. Double-hung window sashes that tilt in make cleaning easier, and full screens allow optimum airflow when the top window is lowered and bottom window raised. Finer meshed screens let more light through and do not obscure the view as much as standard screens

All About Scrapers For Window Washing

What Are Scrapers And Why Do You Need Them?

Scrapers, sometimes referred to as window scrapers, window cleaning razor, or window and glass scraper or blade, are an essential tool in a window cleaner’s tool belt. They easily remove paint, tape, stickers and construction debris like stucco or caulk from walls, windows, tiles, and glass.

Size

Scrapers for professional window washers are manufactured in multiple sizes to allow the window washer the best possible choice for a job. The 5 and 6-inch scraper tools are amongst the most popular, but they can be found in 3 and 4-inch sizes as well.

Replacement Parts

Replacement parts for a window cleaning scraper with blades consist of cover, blade and insert track. The cover is used to protect the blade from unnecessary wear or damage while also protecting the window cleaner from bodily harm. Blades, like scrapers, come in multiple sizes. Purchasing the correct size blade for your window scraper is essential. Blades will not work with a scraper that is not the same size. The blade is placed on the insert track, and this combination is slid into the head of the scraper. The insert track keeps the blade steady and secure within the scraper tool.

Angle Of Scraper

To help facilitate the ease of removing challenging debris, the head of a window scraper will be either flat, angled, or bent forward. These options allow the window cleaner to choose the best alternative for the job.

Special Features

Some professional window cleaning scrapers are unique in that they are adjustable or retractable. Professional scrapers that are adjustable allows the head to be maneuvered so that it can be flat or bent at an angle, letting the window washer choose which angle will work best at any moment. Retractable scrapers allow the blade to be retracted into the head of the scraper tool when not in use, bypassing the need for a cover.

SQUEEGEES: A GUIDE

IF THERE IS ONE TOOL THAT DEFINES A PROFESSIONAL WINDOW CLEANER, it’s certainly the squeegee. For over 100 years window cleaners have been able to clean quicker and better than those using towels to wipe the window clean. There is a surprising variety of squeegee options available, which can be intimidating when you are trying to make a purchasing decision. This guide will help you sort through the options so that you can decide what works best for you and make sure everything is compatible.

A SQUEEGEE IS MADE UP OF TWO PARTS: CHANNEL AND HANDLE. Channels come in a variety of lengths so that you can get the one that works best with your job. Most window cleaners have a variety of lengths on hand to handle different jobs. The handle holds the channel, and it the part of the squeegee you will grab and hold onto

YOUR CHANNEL HOLDS YOUR SQUEEGEE rubber, which wipes water off of the glass. It will have an extruded metal piece, the rubber, and usually a clip that holds the rubber in place (see clipless channels below). All of the channels that we sell include a rubber and, if applicable, clips.

ONE OF YOUR BIGGEST DECISIONS TO MAKE is what material you want your squeegee to be. Material is one of the biggest factors in how heavy your squeegee will be and how rigid your channel will be

BRAND SPECIFIC

Some brands such as Ettore and Unger have designed their handles to work better with their poles. The pole tip will have a locking mechanism that fits into the handle, securing it in place. The is a convenient feature, but you should note that these poles will still work with other brands of handles and these handles will still work with other brands of poles

Window Cleaning Made Simple

A clean window literally makes a difference in how you view the world. Here’s how to get them clean in just a few easy steps.

Washing windows doesn’t have to feel intimidating. With the right tools and these tried-and-tested tips, the process is quick and easy, and the payoff-that warm stream of morning sun pouring into your bedroom-totally worth the effort.

To start, gather all of your window-washing tools into one plastic or metal bucket (keep a second bucket on hand to mix cleaning solutions). Dirty panes are no problem when you use rubber-edged squeegees, which are quicker and more effective than cloth or newspaper. They come in a variety of sizes, and a screw-on extension will let you reach high spots.

Martha uses a squeegee and a homemade cleaning solution of water and powdered dishwasher soap to clean her windows. You can also make an all-natural window cleaning solution using a mixture of equal parts white vinegar and hot water. Adding a touch of liquid soap to the vinegar solution will help remove any streak-causing wax left on the window from commercial cleaners used in the past. You can eliminate the soap after a few washings. Once your cleaning solution is mixed, read on for the how-to.

For huge picture windows, professionals favor a method called the snake. Starting in an upper corner, pull the squeegee horizontally across the window. At the opposite corner, turn, lower the squeegee to the water line, then pull it across the window. Work your way down and touch up the edges with a cloth. Then, dry windowsills with a cloth.

How Much Does Window Cleaning Cost?

Let’s face it: No one likes to wash windows. And if your house is two stories or taller, making your glass gleam again can be dangerous. That’s why it may be a good idea to hire a professional window cleaner.

Paying by the pane

Window cleaning generally is priced by the number of panes of glass. An ordinary double-hung window consists of two panes. The typical window washing cost runs from $2 to $7 per pane. Alternatively, some companies charge an hourly rate. We report paying an average of $266 for a full house window cleaning, which may include screens and doors.

For best results, it’s generally a good idea to have your windows cleaned twice every year. However, a number of factors, including whether many windows face the ocean, or your house is exposed to frequent storms, can affect how often your windows will need cleaning. 

Although window cleaning may seem like a relatively straightforward job, there are variables that can affect the final cost:

How dirty is the glass? Dirtier windows generally require more tools and equipment, not to mention time.

Number of windows — The more that need washing, the more you can expect to pay.

Ease of access — Ladders, special tools and extra time may be required to clean some hard-to-reach windows.

Inside, outside or both? Selecting interior-only or exterior-only service may save you a little money today, but like most services, when you opt for a la carte pricing you pay more per service. If you think you’ll eventually want both, it’s best to get them done at the same time.

There can be extra charges for:

Screen cleaning, at 50 cents to $5 each, and sliding glass doors, which run $2.50 to $8 per door.

Cleaning windowsills and tracks; the cost can range from 50 cents to $5.

Paint or stain removal, which can cost $3.50 to $6 for a window of average size. Mineral deposit removal can cost up to $20 extra per pane if it’s not included in the company’s price.

Going up: The cost of window work on the first and second floors of a home is generally the same, but additional floors can cost up to $3 to $5 more for every window.

Rodent Repellents

Rodents Don’t Stand a Chance with Same-Day

Your home is meant to be a comfortable, safe space. When there are sounds of scratching and squeaking in your walls, it can take a toll on your peace of mind.

Not only that, but rodents can wreak havoc on your health and your home, carrying bacteria and pathogens into your house, contaminating your food, tearing up insulation, and chewing through wires. If rats, mice, or gophers are putting your home at risk

One of the reasons rodents are feared by homeowners is that they are difficult to exterminate. Rats, mice, and other rodents are resilient, and they can travel through your home largely undetected. These pests reproduce rapidly, so until you can be certain you’ve removed them all from your home, your infestation can continue to grow unseen behind the walls.

Warning signs of a rodent infestation in your home may include:

Rodent droppings in closets, cupboards, or corners of your home

Loose nesting material like torn up paper, fabric, plant matter, or insulation

Gnaw marks on furniture or food packaging

Stale smells coming from hidden areas.

Choose The Best Pest Control Services To Deal With Rodent Control

Pests &You: Is It A Happy Relationship?

No, not really! These days, pests have become something very common in every household. This is a persistent problem due to the adverse weather conditions. But it cannot be an excuse for you. You should look for ways to get rid of pests. Isn’t that so?

There are so different kinds of pests i.e. ants, termites, rodents, ants, mosquitoes and other kind of annoying pests which might be staying in your home and you might not be just aware of it. Therefore, this is the very right time to look for the pests who are damaging the structure of your home.

Choose A Reputed Pest Control Provider

Unfortunately, a spray is not really an effective measure when it comes to dealing with the pests. To control the pests in your home, you should first look for a reliable and trustworthy pest control provider. With the pest control system, the pests can be really harmful and they can destroy for health

Experience Matters

While you are searching online, there are many reliable and trustworthy service providers. They have been in the business since a long time and with their huge years of experience they can assure you with the top quality services.

RODENT CONTROL

With big eyes, curious dispositions and perky ears, it’s easy to think of rodents as cute, harmless creatures. But make no mistake about it – rodents are destructive, unsanitary and menacing. Many rodents carry serious diseases and parasites such as fleas and ticks. The danger from rodents isn’t just from direct interactions. Typically, they will eat and defecate in areas where your family eats or plays, increasing the potential for contamination of your food sources, countertops, and floors. Some research has found that mice and rats can contaminate 10 times the amount of food that they consume.

RID YOUR HOME OF RODENTS WITH PEST CONTROL

Rodents need to be controlled before they make you or your family sick, which makes rodent infestation control extremely important. Rodents breed quickly and a single sighting is usually not the whole story. Typically, the one mouse or rat you spot originates from a nearby nest containing hundreds more of his rodent roommates. In addition to contaminating your food and surfaces, a rodent’s penchant for chewing can wreak havoc in and around your home.

It’s imperative that you have a professional seek out the rodents’ location and their points of entry of your home. These spaces are typically smaller than you might think. The Pest Control professionals can help you locate these areas and provide exclusion techniques to keep them out, as well as trap the ones already inside.

Following the rodent detection and elimination visit, your personal technician will focus on outdoor perimeter pest prevention, to ensure that your home’s pest defenses are functioning as intended. Taking that much time off work is difficult and inconvenient, so we do not require you to attend the rodent prevention visits. Our treatment plans are designed with your convenience in mind. We provide monthly, every-other-month, and quarterly treatment plans.

HOW TO GET RID OF RODENTS

While you should always opt for professional rodent infestation control — as expert control is the only sure way to eliminate this furry plague from your home — you can apply preventative measures that may alleviate the issue.

Rodents

Why is Pest Control for Rats and Mice Necessary?

Rats and mice are a serious pest of humans − and they also freak many people out

Here are some reasons why you should arrange rat or mouse pest control as soon as possible:

Rats and mice are responsible for enormous loss of food and can transmit diseases to humans such as Salmonella food poisoning, leptospirosis and tape worm. They can also transmit fleas and may even bite if they become scared or cornered. To avoid negative health effects, arranging prompt pest control for rodents is crucial.

Their gnawing habits (which are necessary to control the size of their chisel-shaped front teeth) cause damage to buildings, plumbing, gas pipes and electrical wiring.

They’ve even been found to be the cause of some building fires!

Best Rodent Control

INSPECTION

During our initial visit we’ll send one of our licensed pest control professionals to your home. He or she will provide a thorough inspection of the interior and exterior, paying special attention to where mice or rats can access the home

SEAL OFF ENTRY POINTS

Next, we’ll seal off any rodent entry points that we locate during our initial inspection, utilizing a combination of materials from caulk, to copper wire mesh, to expanding foam. Rest assured, we’ll tell you if we discover a gaping hole or construction-related issue that we can’t seal. 

INSTALLATION OF A RODENT BAIT STATION

Once entry points are sealed from the exterior, it is a necessary part of any successful rodent treatment plan to maintain mice and rat populations from the exterior, utilizing a specialized and tamper-resistant bait station. And not to worry, safety of people and pets is our number one priority!

INTERIOR/EXTERIOR RODENT TREATMENT

During this key stage of treatment, our licensed pest control professionals will use a combination of products proven effective to treat mice and rats where they are active inside your home. Speak to our representatives to discuss the options that will work best for you.

FOLLOW-UP INSPECTION & TREATMENT

We understand that multiple treatments are a necessary factor in complete eradication of mice or rats from inside your home